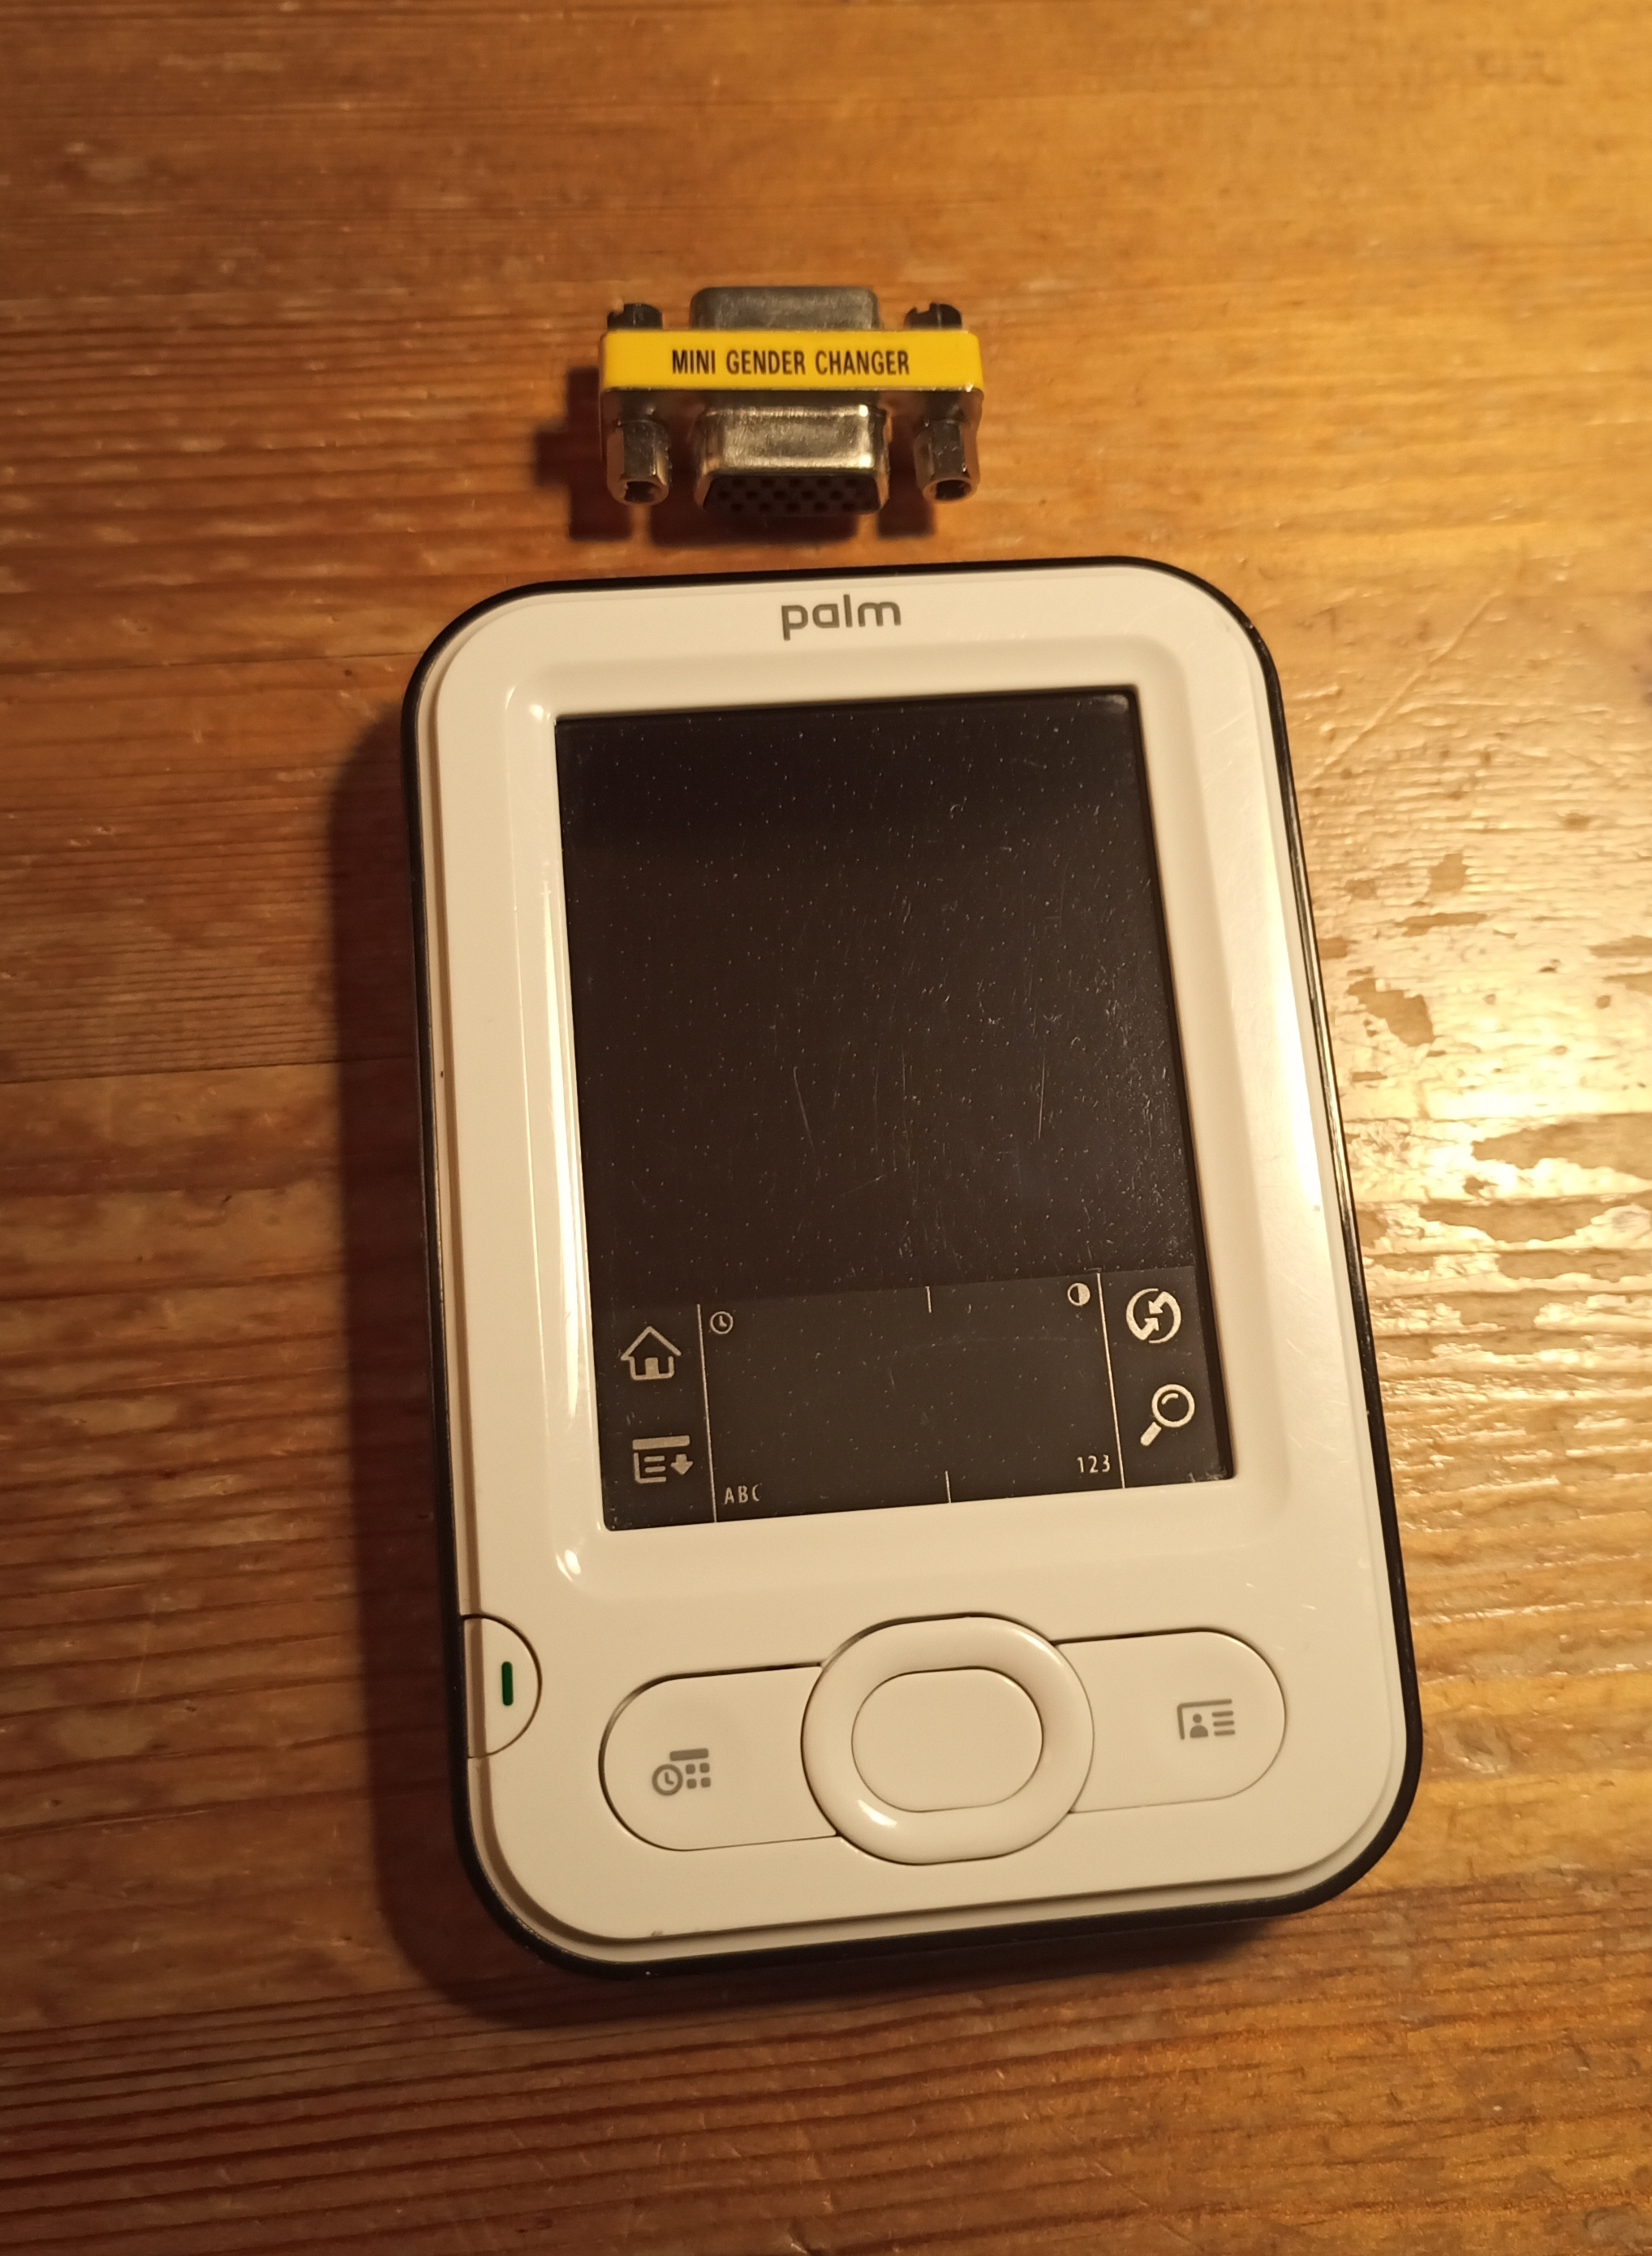
Pictures
See [pics directory] for all pictures. Most are inline here in the relevant section.Labelled board shot
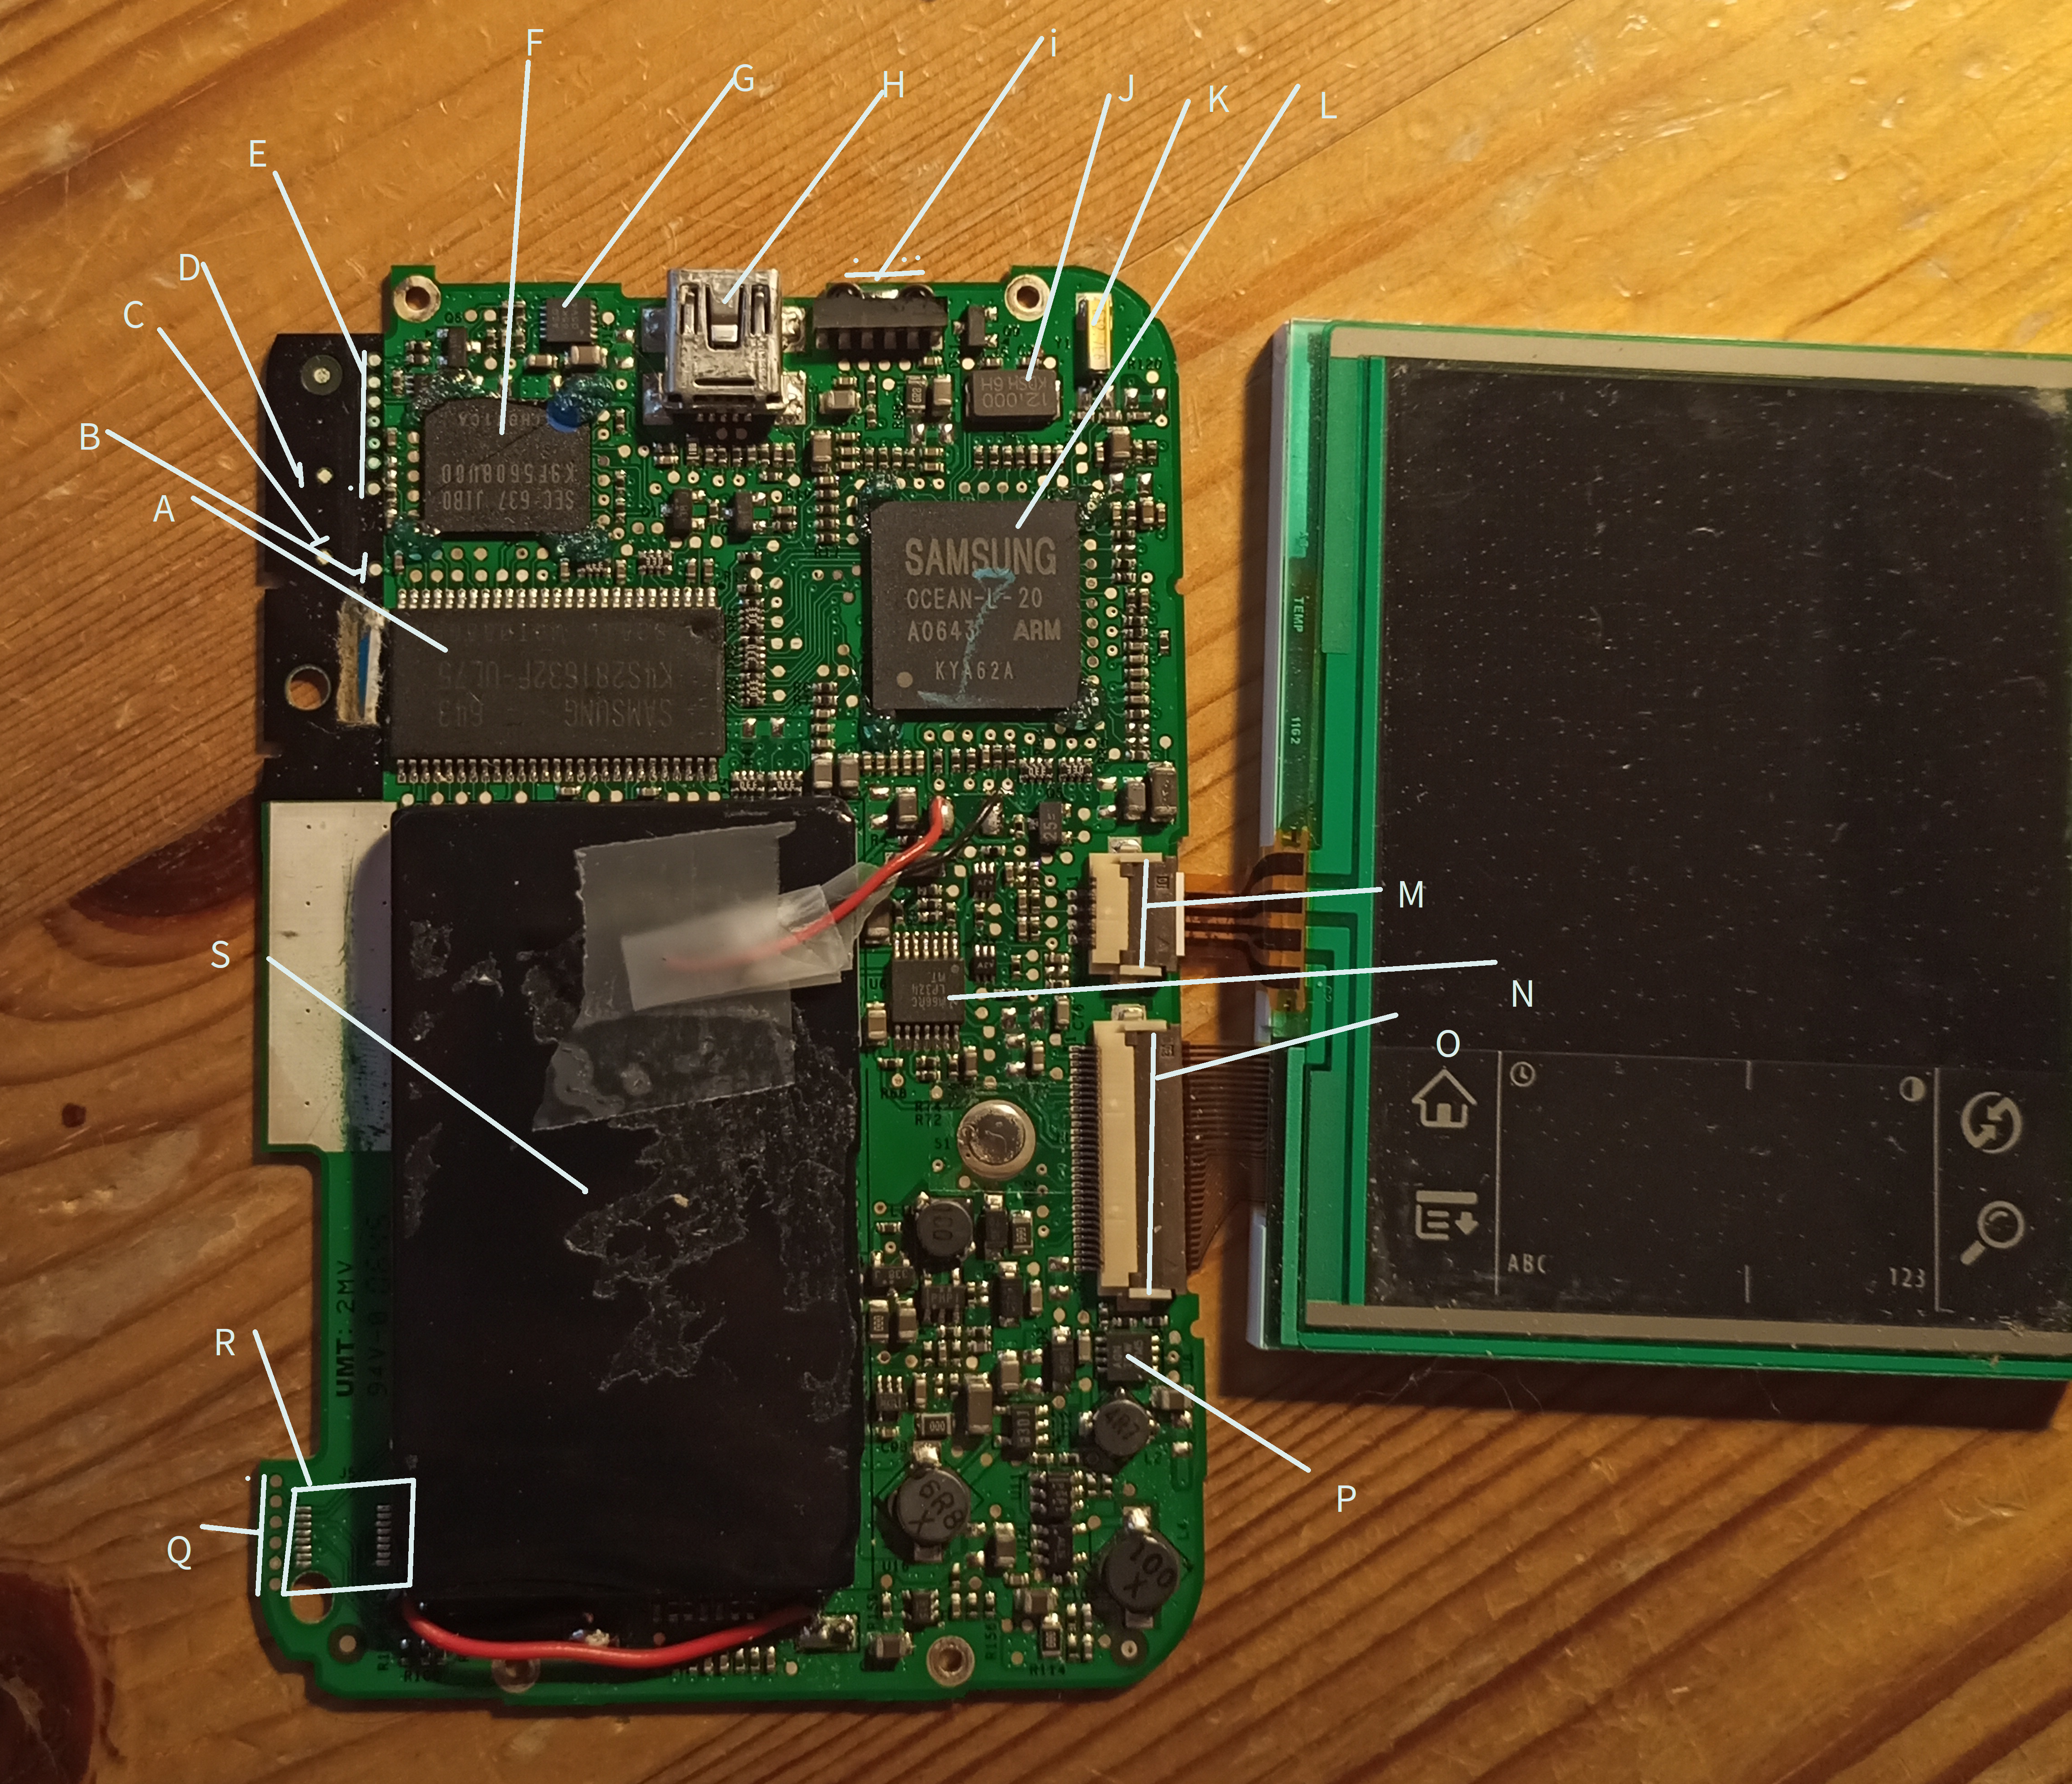
*: Under investigation for more details. ?: Unsure/Unclear of model or make
- A: Samsung 128mb SRAM K4S281632F-UL75
- 8M x 16 (16 bit read/c)
- 166Mhz, LVTTL, supply 2.0v & 3.3v
- B,C, D, E: (Not that important) test points
- F: 256M bit (32M x 8 Bit) NAND Flash Memory - Samsung k9f5608u0d
- Supply 3.3v
- G: *** ?
- H: Mini-USB
- I: IR transmitter & receiver - Probably connected to MCU UART channel 1
- J: High frequency oscillator
- K: Slow crystal (RTC - 32.7 KhZ)
- L: Samsung S3C2410A, ARM920t (ARMv4t)
- M: Digitizer flex cable
- N: LP324 MT (NatSemi pin-for-pin LM324) - Micropower Quad Operational Amplifier
- O: LCD flex cable
- P: TPS61043 constant current LED driver - or similar model
- Q: Connected to R (see also: pads under battery)
- R: JTAG + misc. (see debug header section)
- S: Li-Ion Battery
Datasheets
- MCU: [Samsung ARM9 S3C2410A]
- SRAM: [Samsung 128mb SRAM K4S281632F-UL75]
- LP324: (LM324 clone) easily googleable
- TPS61043: easily googleable
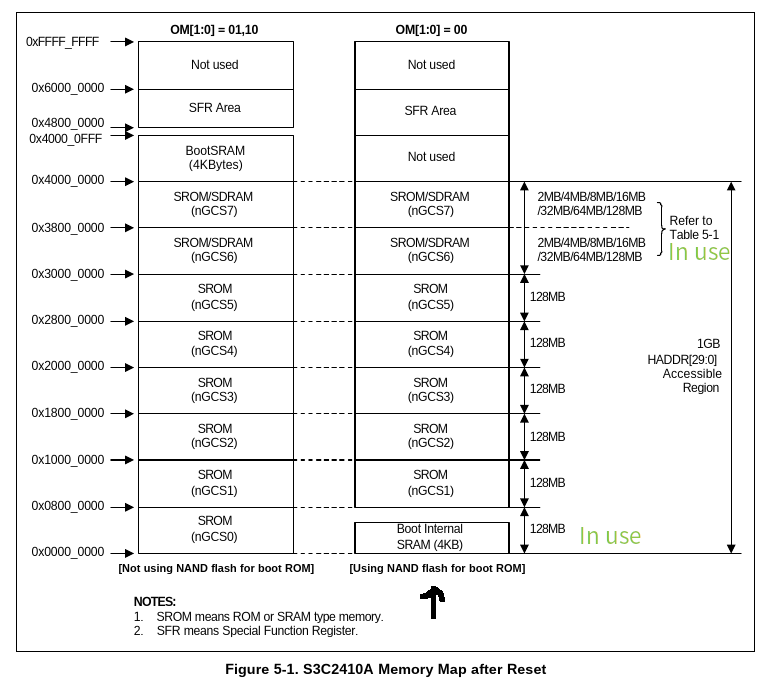
Useful diagrams:
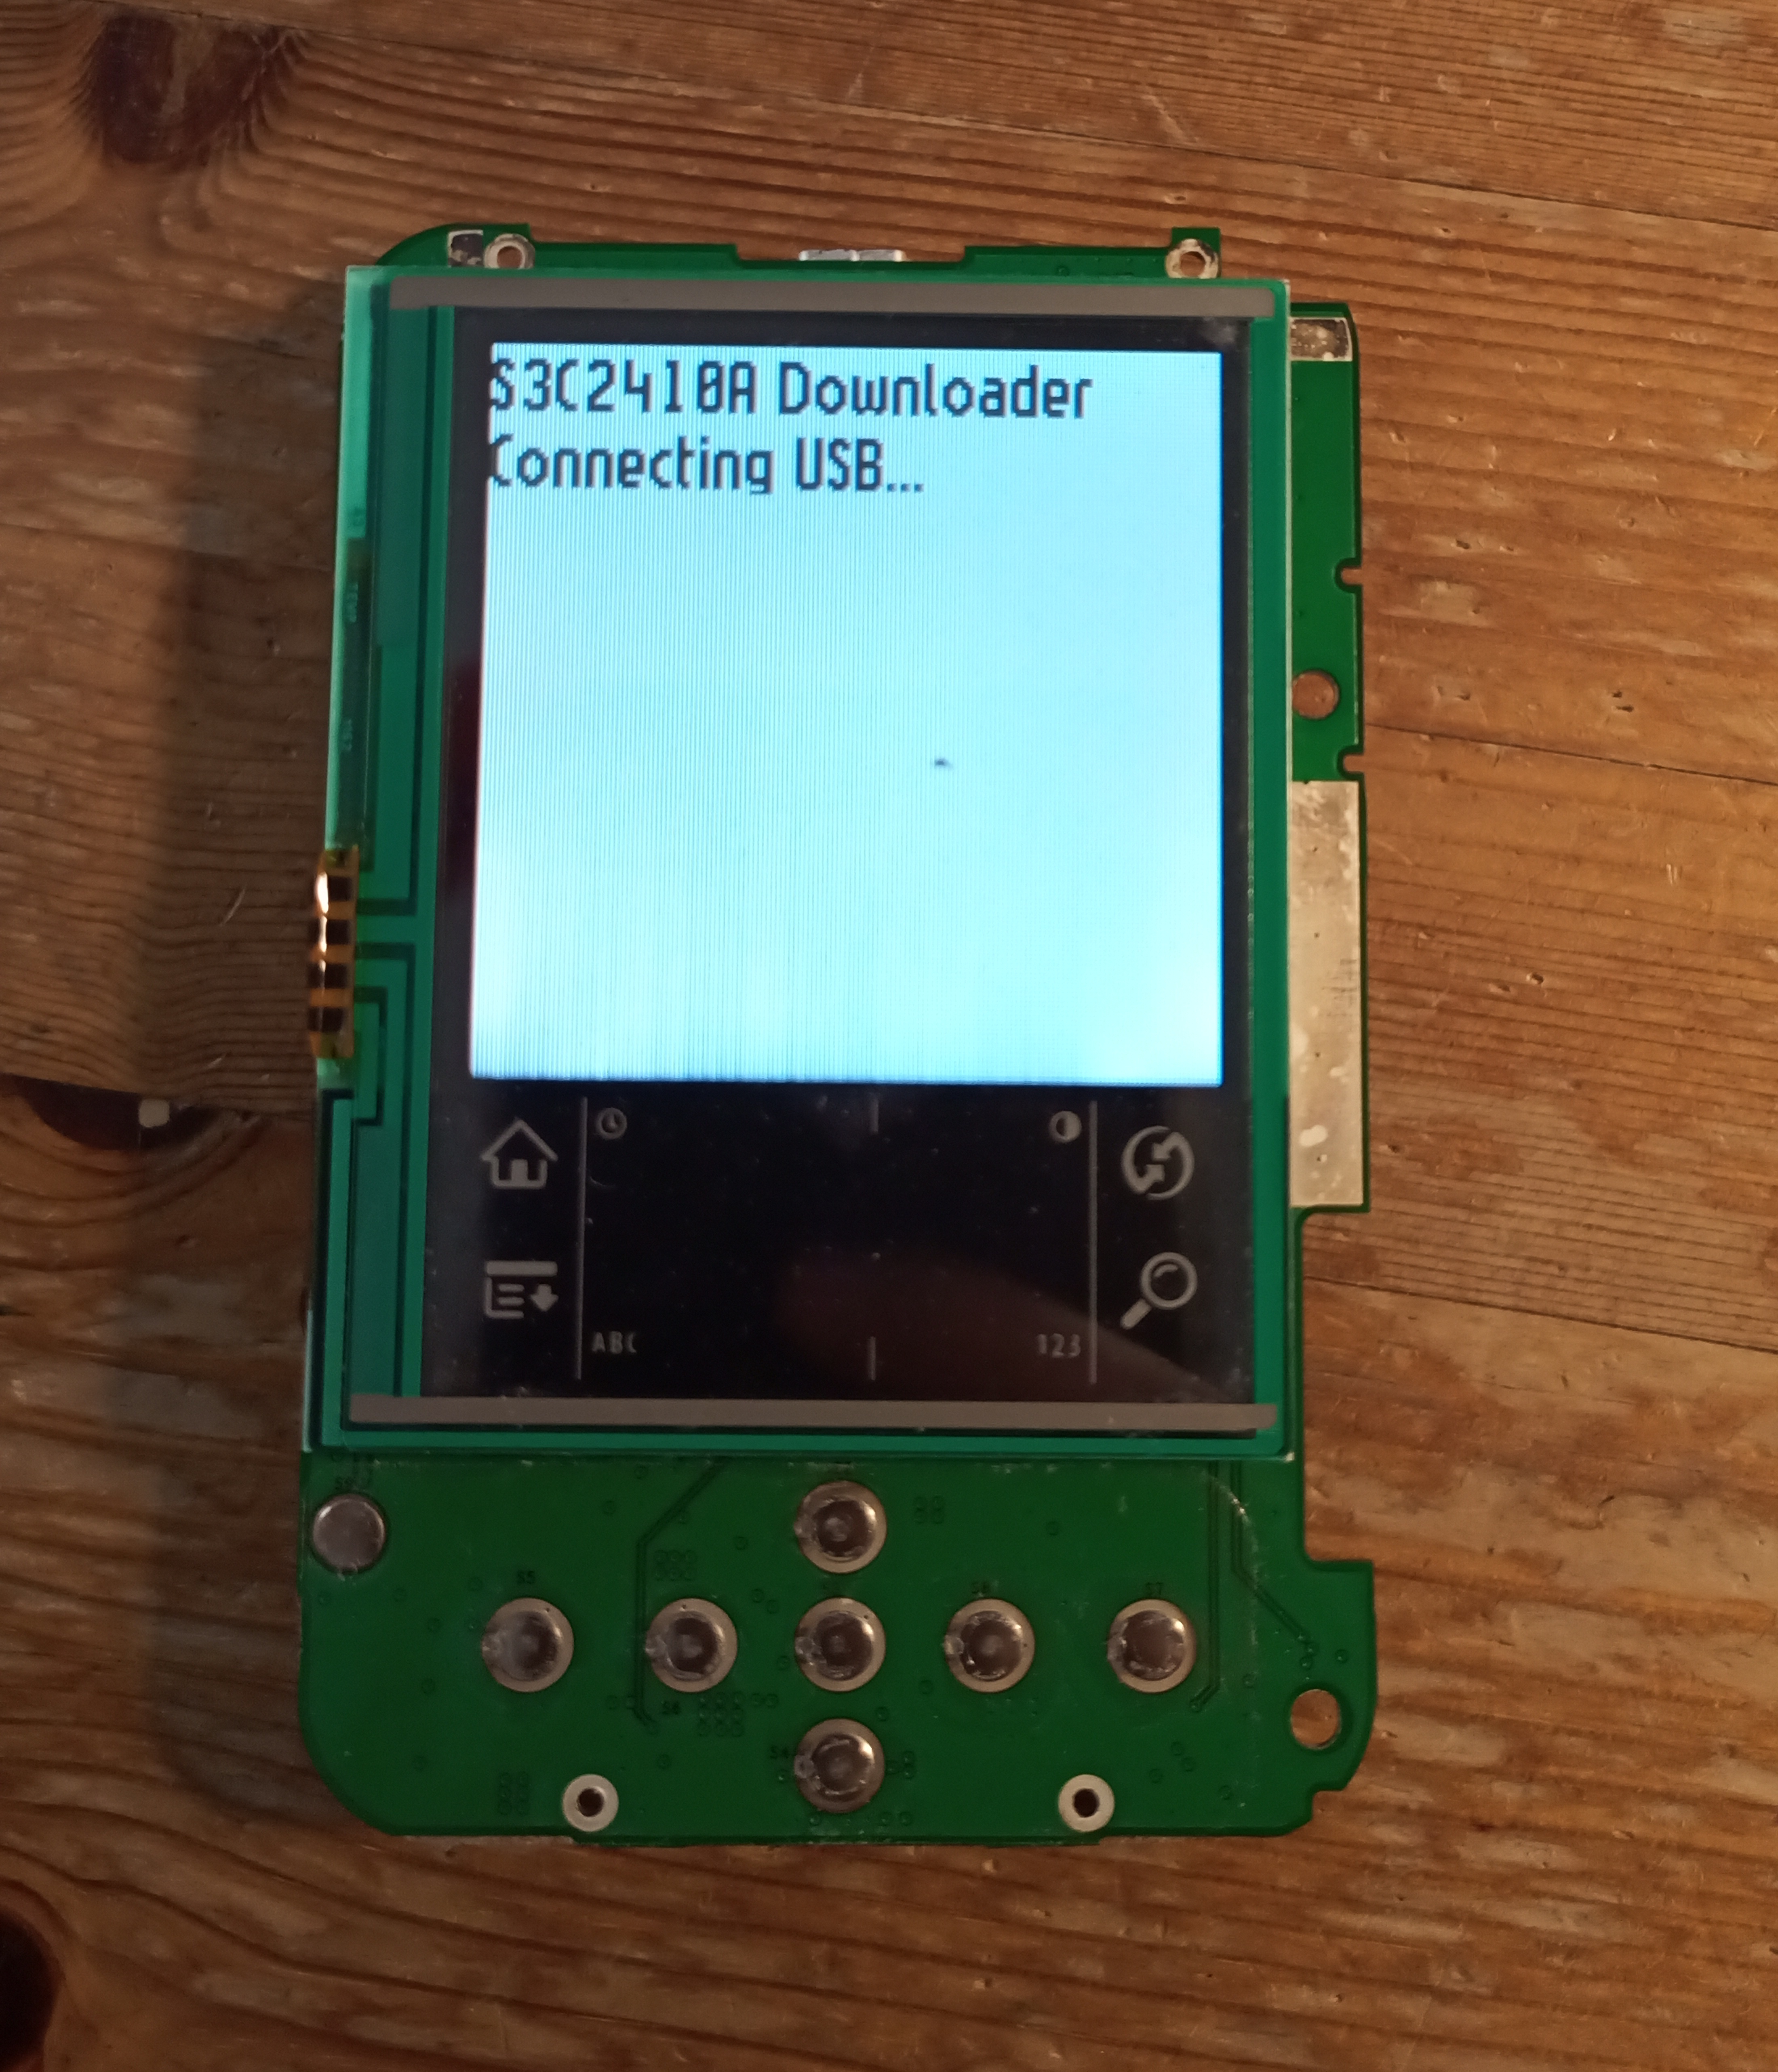
Built-in bootloader
Pressing center/OK button while the device resets boots into a (presumed) USB flasher/bootloader.
[USB descriptors]. I think "Owon PDS6062T Oscilloscope" as well as "System MCU SEC S3C2410X Test B/D" are possibly just ID reuse (that particular ARM core with integrated USB may have been popular in unrelated product at the time), though to be confirmed as it could speed up things significantly. One in, one out bulk USB endpoint. Will try some libusb shenanigans to try to dump NAND. (Note: I successfully soft bricked my original device doing exactly that. I will try to directly backup NAND before doing this sort of thing.)
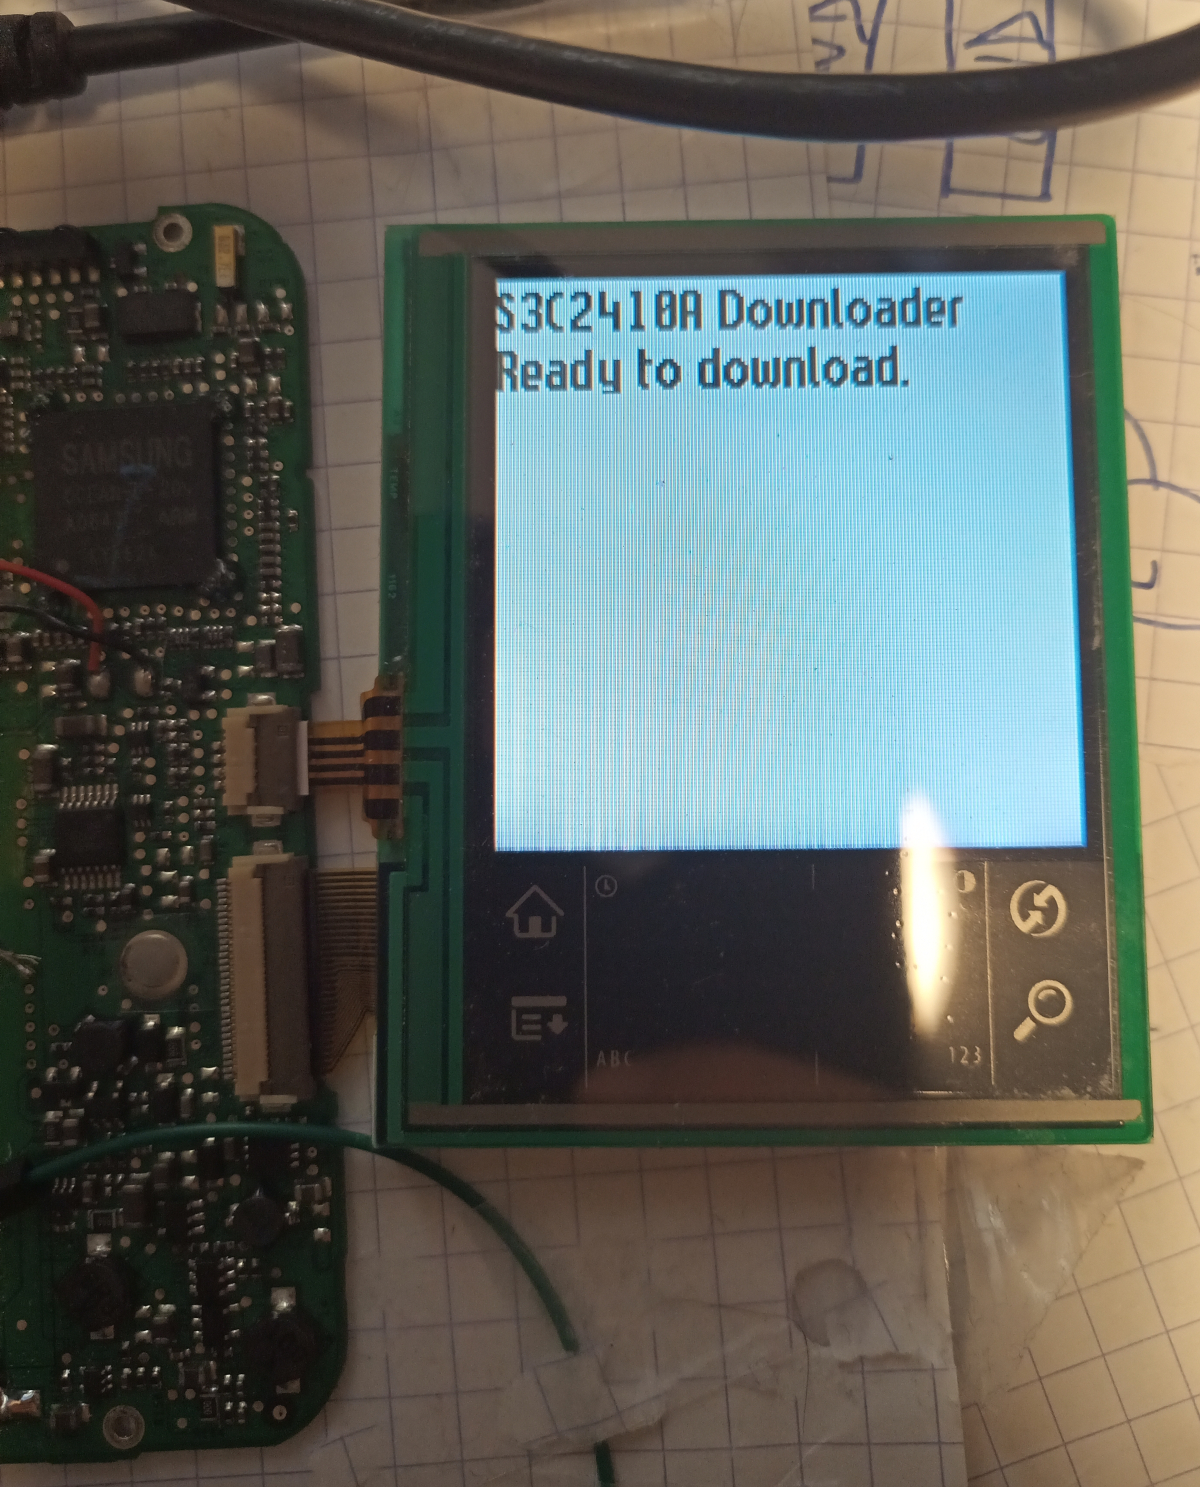
[557837.438765] usb 7-1.3.4: new full-speed USB device number 12 using xhci_hcd
[557837.546591] usb 7-1.3.4: New USB device found, idVendor=5345, idProduct=1234, bcdDevice= 1.00
[557837.546593] usb 7-1.3.4: New USB device strings: Mfr=1, Product=2, SerialNumber=0
[557837.546595] usb 7-1.3.4: Product: SEC S3C2410X Test B/D
[557837.546596] usb 7-1.3.4: Manufacturer: System MCU
[557864.403704] usb 7-1.3.4: USB disconnect, device number 12
Not explored yet, but @jercos from the PalmDB discord pointed me to [this old libusb program] that may be related, as it seeks the same usb manufacturer/device ids. To be continued.
When booted in this mode, trasmits "Initializing GPIO ports" on the UART TX found on the debug header. RX not tested yet, though the NAND dump contains strings that could be expected from a bootloader shell (banner and help for commands).
JTAG
Debug header
There is a 2 x 8 pins debug header on the bottom left, with annoying but solderable test points. Not all function identified, but there is JTAG.
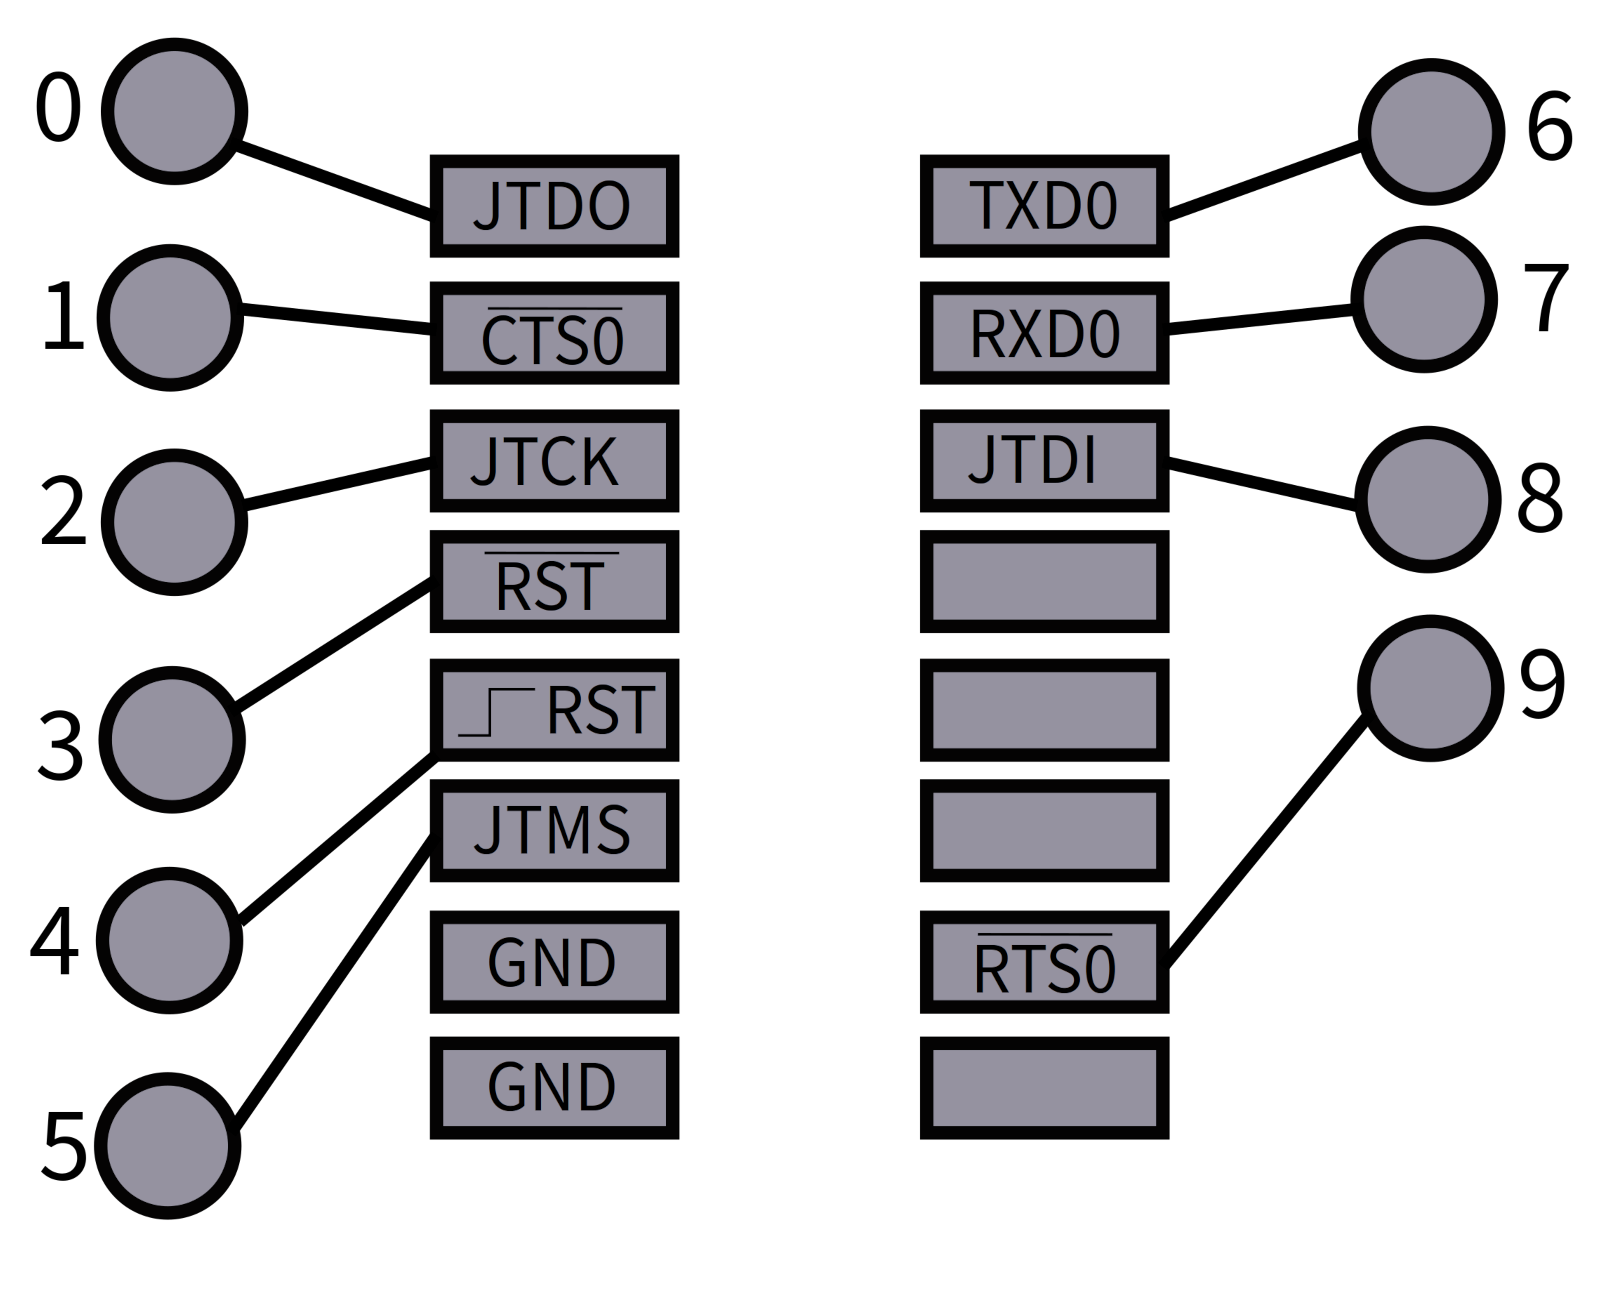
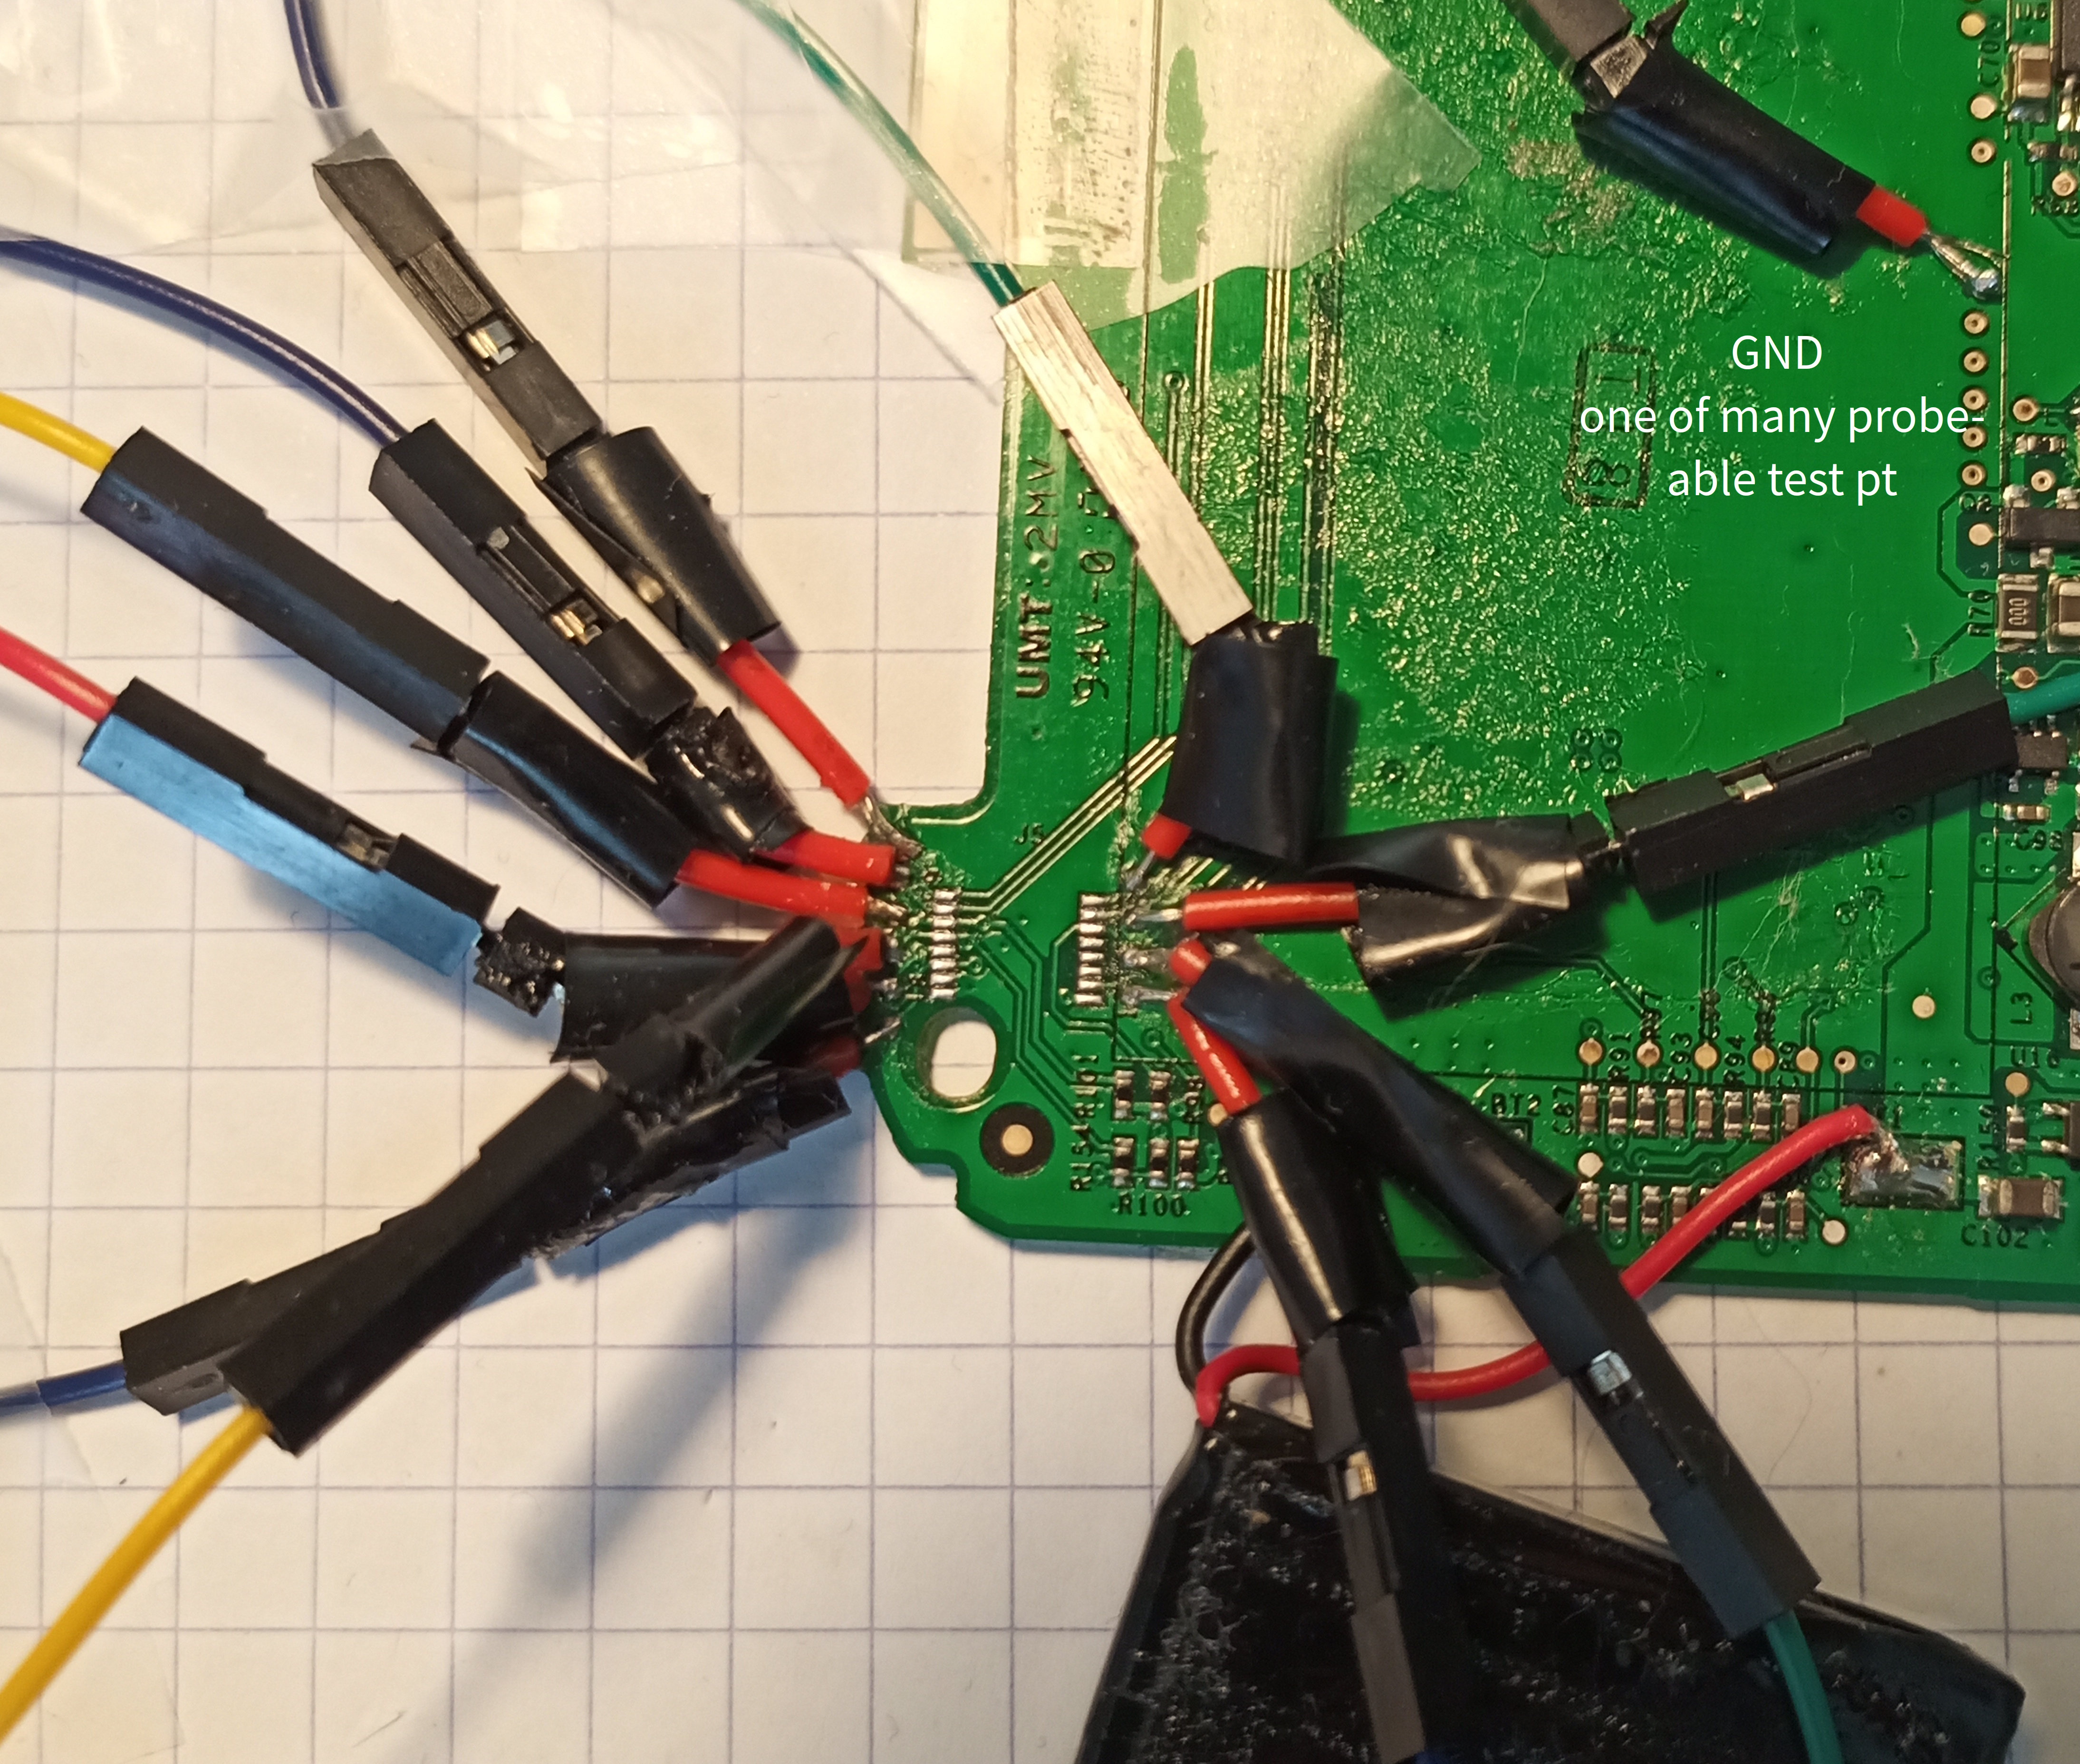
It seems UART hardware flow control is not in use in PalmOS or the USB bootloader. Corresponds to UART channel 0 of MCU.
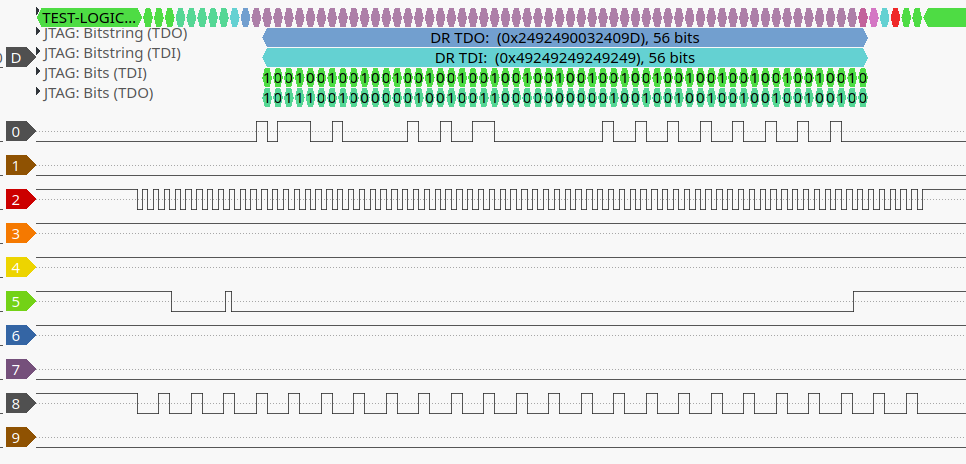
JTAG check
Default JTAG command is IDCODE, shifting out 0x0032409D (32 bits) then passing trough what was shifted through TDI.
OpenOCD configuration
If you use a FTDI FT2232H breakout board as USB-to-JTAG, a [config file for the default (datasheet) pinout]. Note that in this case, ADBUS1 = JTDI = test point 8, ADBUS2 = JTDO = test point 0.
But more importantly, a commented [z22 config file]
Useful (interactive) OpenOCD command includes:
# Disable MMU to get physical memory mapping (useful for exploration and program injection)
s3c2410.cpu arm920t cp15 2 0xc0001278
# Re-enable MMU (pre-requisite to resuming PalmOS execution successfully)
s3c2410.cpu arm920t cp15 2 0xc000127f
# Halt execution, show pc and mode/status
halt
# Resume execution
resume
# Inject program at adress
load_image ./injectable.bin 0x200 bin
# or
load_image ./injectable.elf 0x200 elf
# jump to adress (use objdump to get adress of main in injectable)
resume 0x3078
# Dump NAND (with out-of-band 16bytes every 512) using the super slow built-in driver
nand dump 0 nand_dump_combined 0 268435456 oob_raw
# Hexdump address 0x48000010 and following for 5 words-worth (5*32 bit)
s3c2410.cpu mdw 0x48000010 5
# Disassemble 3 words-worth at adress 0x00000370
arm disassemble 0x00000370 3
# Dump the 128 MB SDRAM content to file (disable MMU before)
dump_image sdram_bank6 0x30000000 134217724
# Dump the 4kb NAND boostrap area to file ram_nand_bootstrap
dump_image ram_nand_bootstrap 0x0 4096
Dissasembly/reverse of the PalmOS ROM
[Ghidra project] for the 4kb NAND bootstrap area, which is loaded at boot from the first pages of NAND to adress 0x0 and jumped to, and which does basic setup, then loads parts of NAND to SDRAM, then jumps there for main startup. Retrieved after PalmOS boot finished, so some parts may be erased/overwritten, but doesn't look like it. Commentary is (to date) largely incomplete, especially in the NAND load functions which I don't understand fully, but gives an idea of what configuration is needed for this board in terms of PLL settings, clock tree & other. Relatively little setup except for NAND loading.
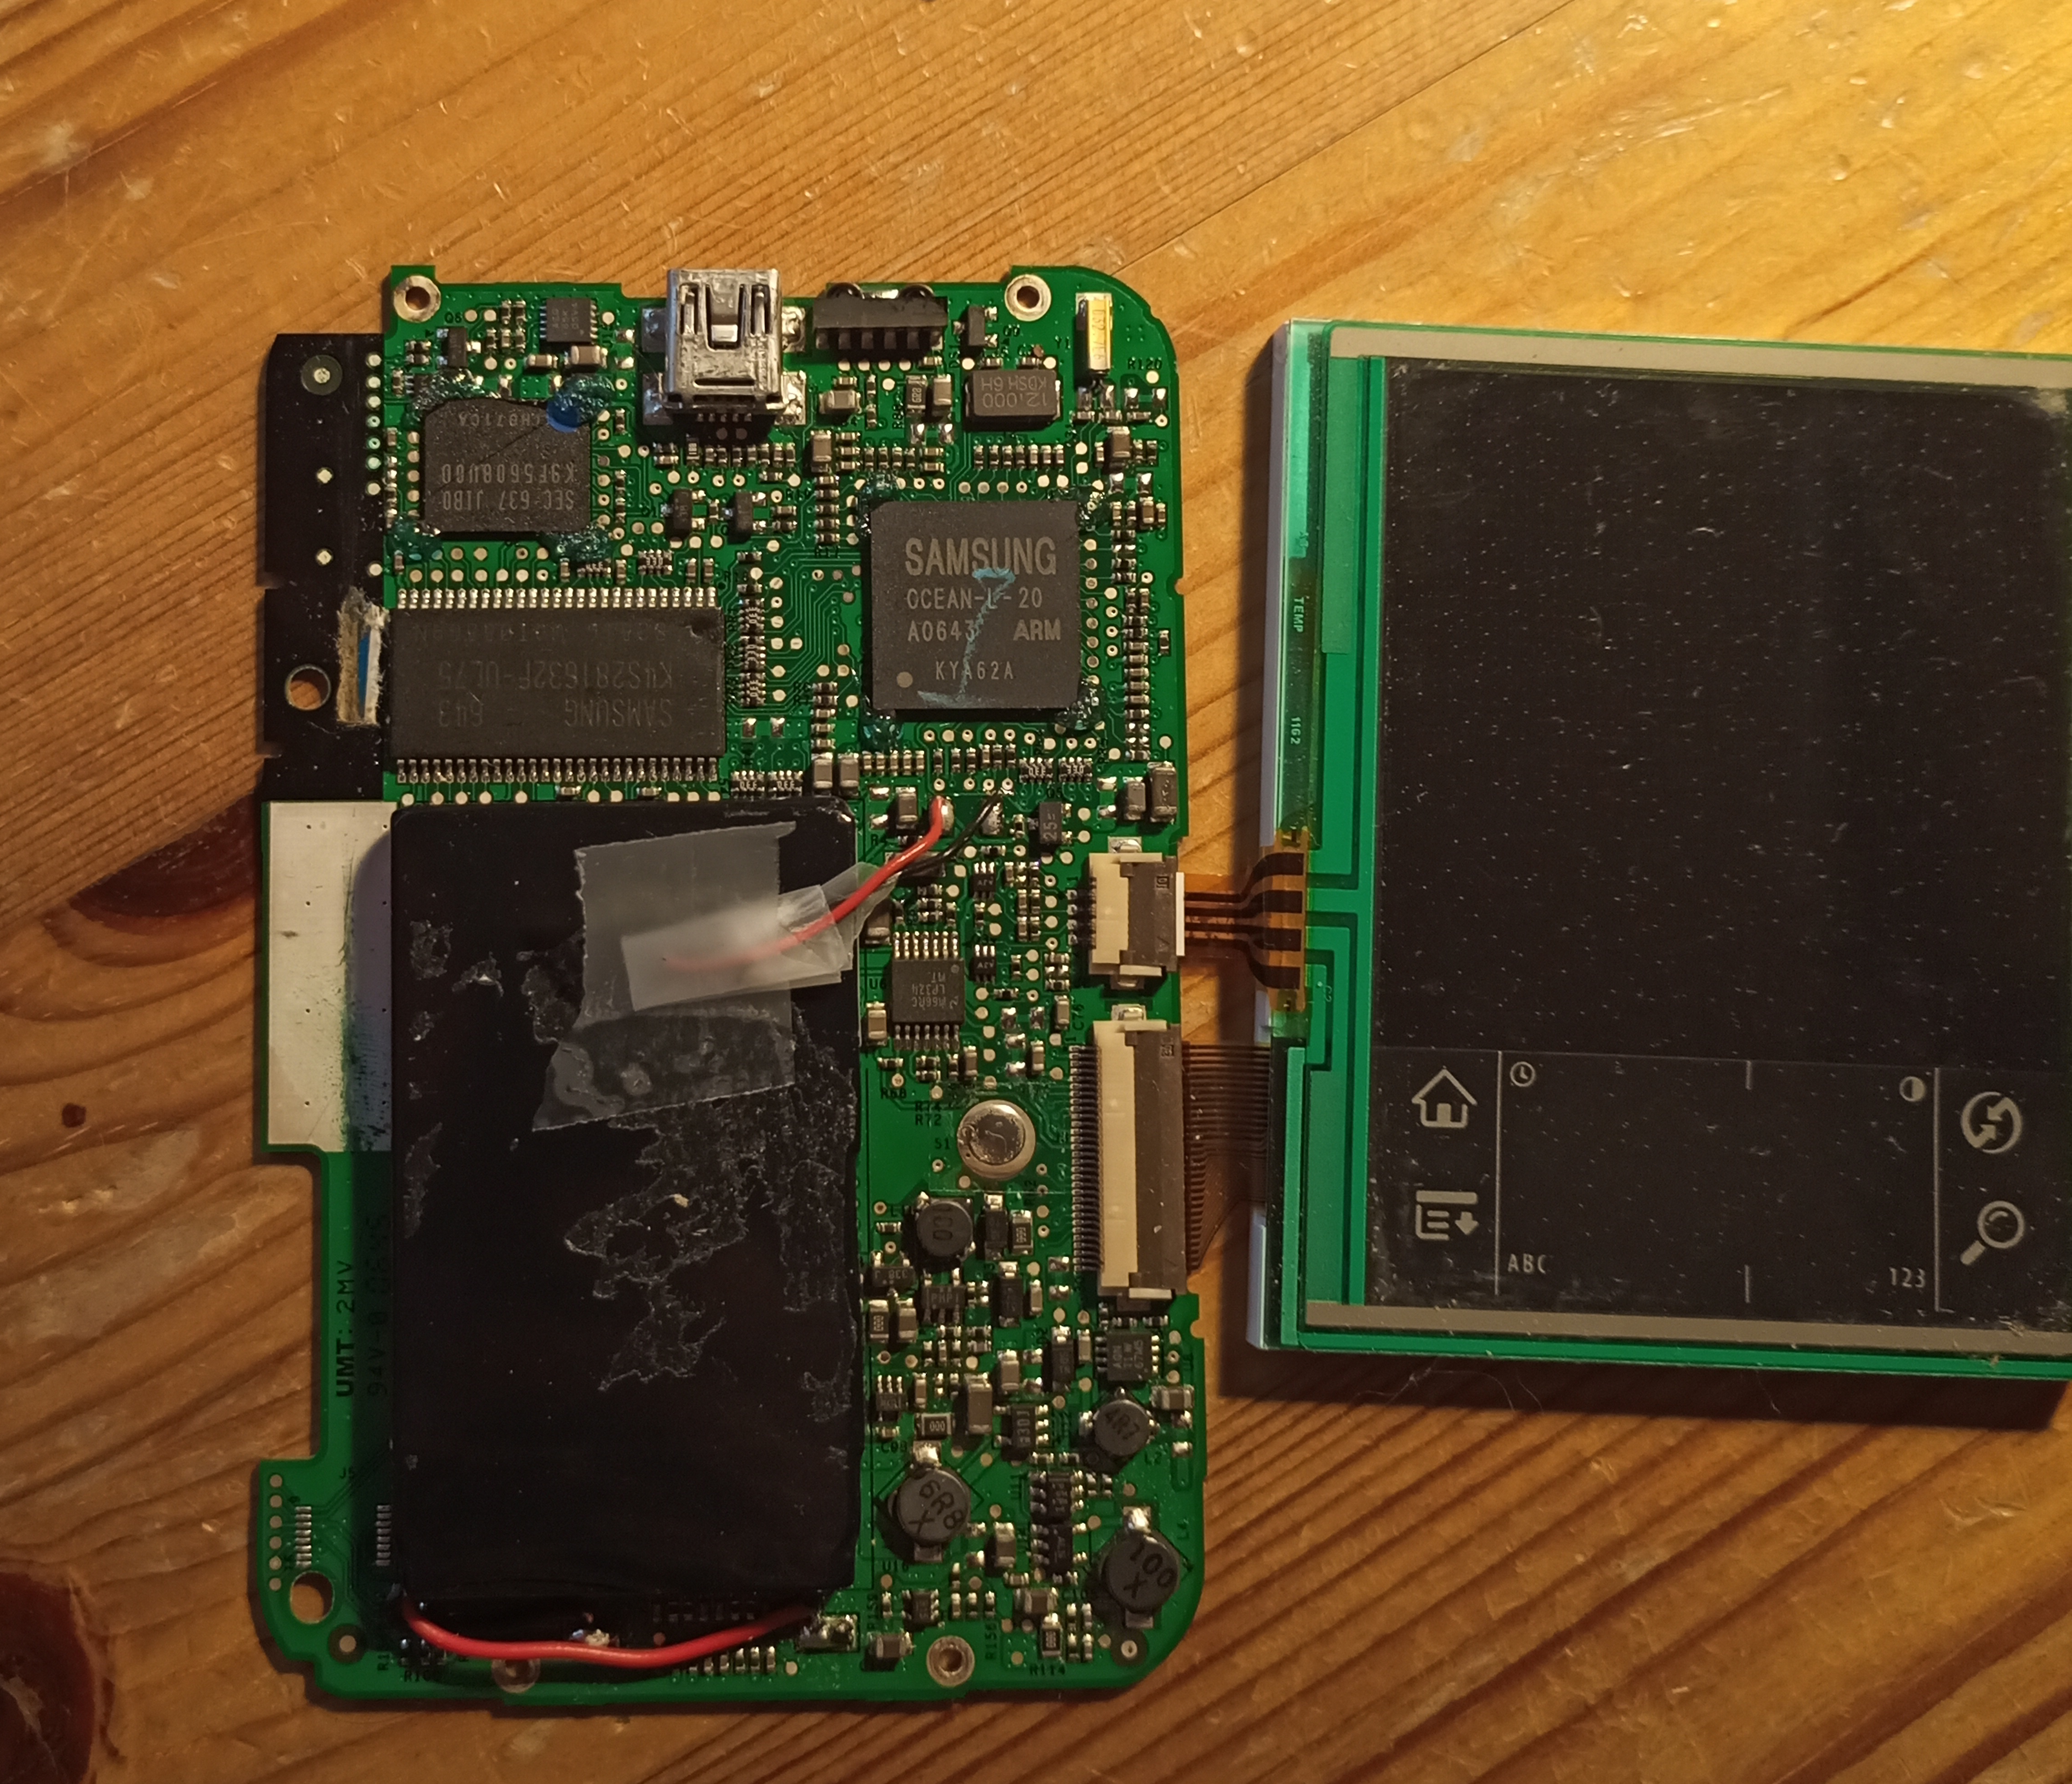
Physical dissasembly
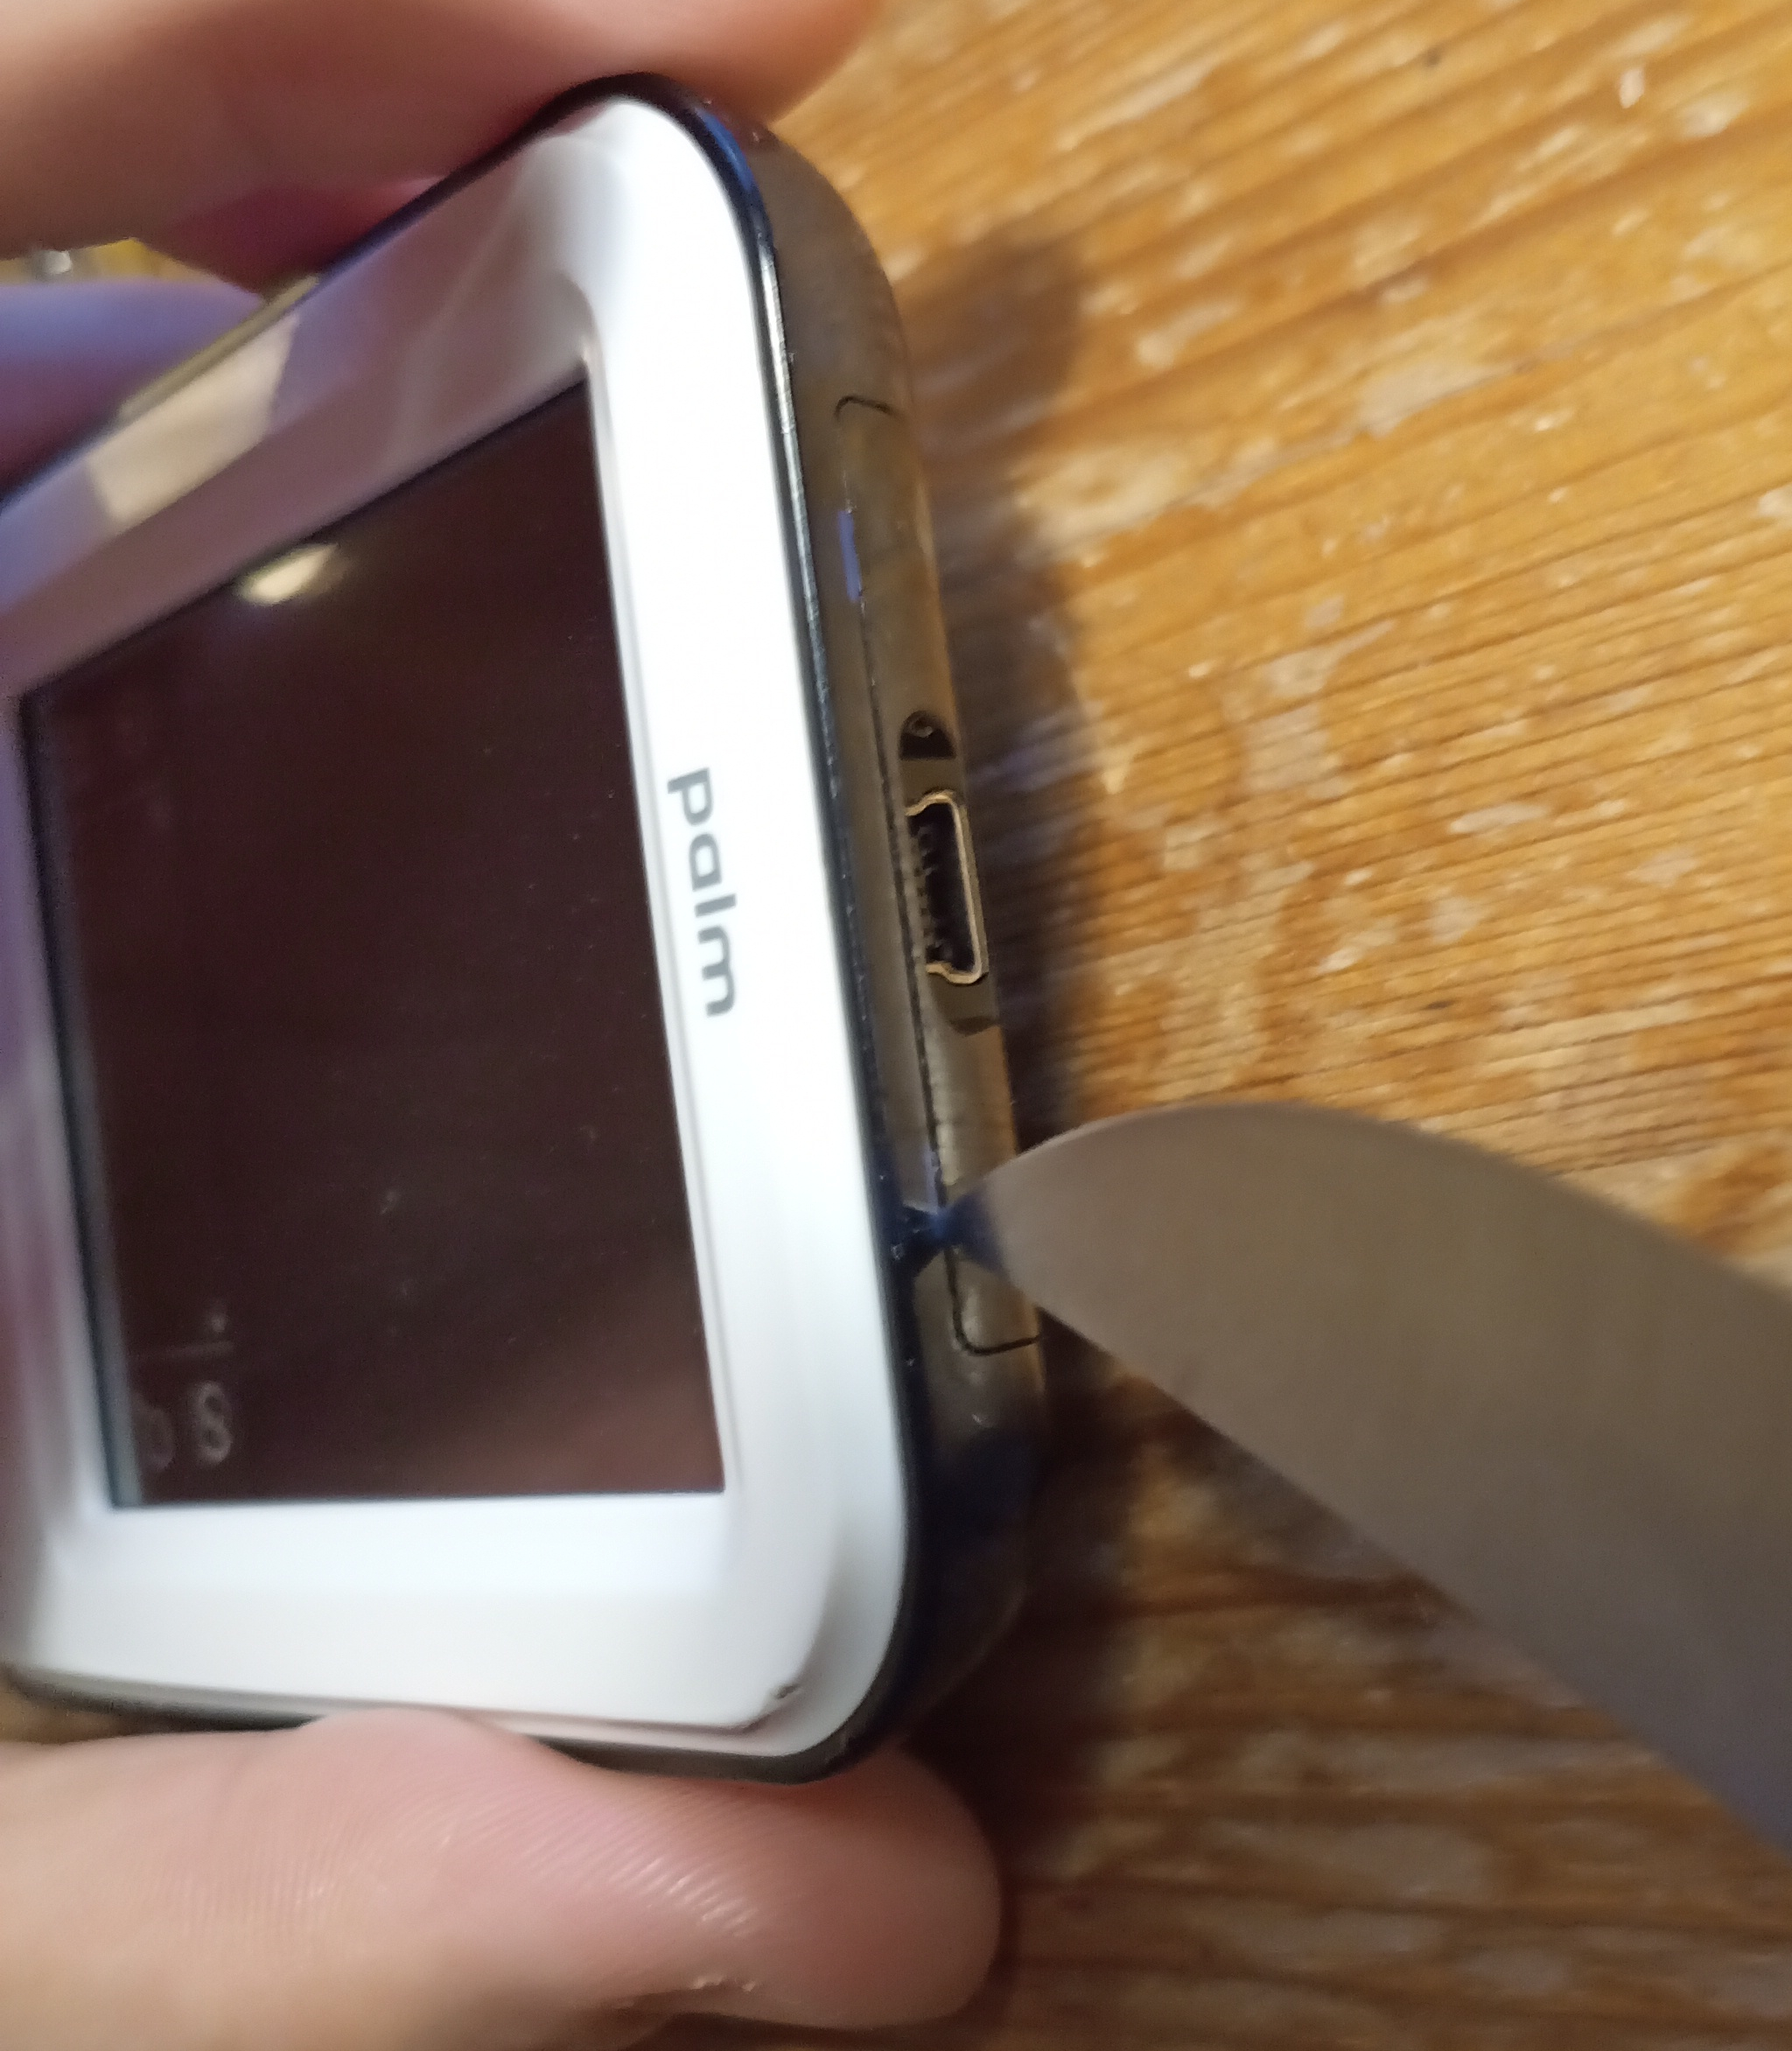
Pry open the IR blaster cover with a knife.
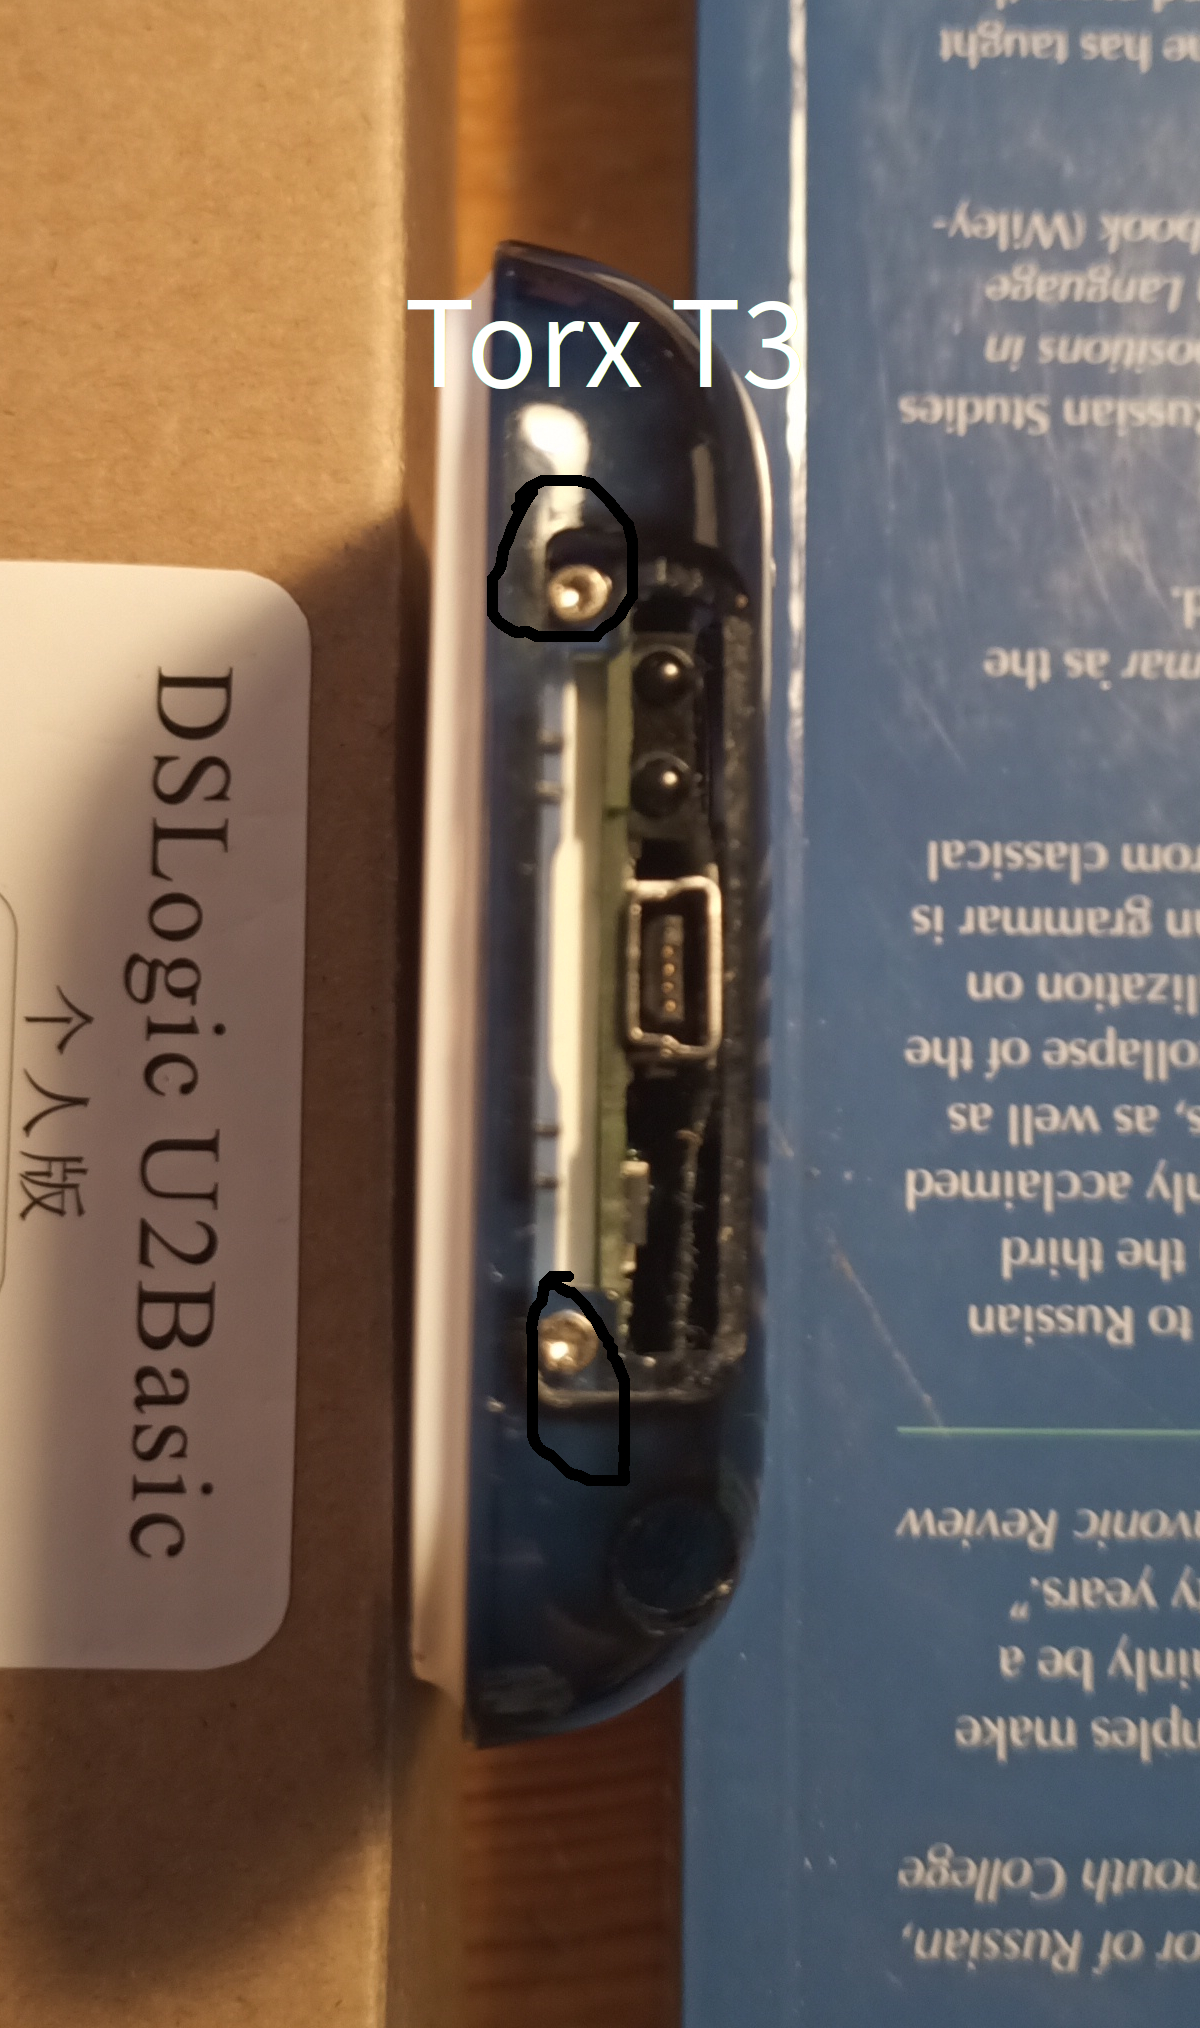
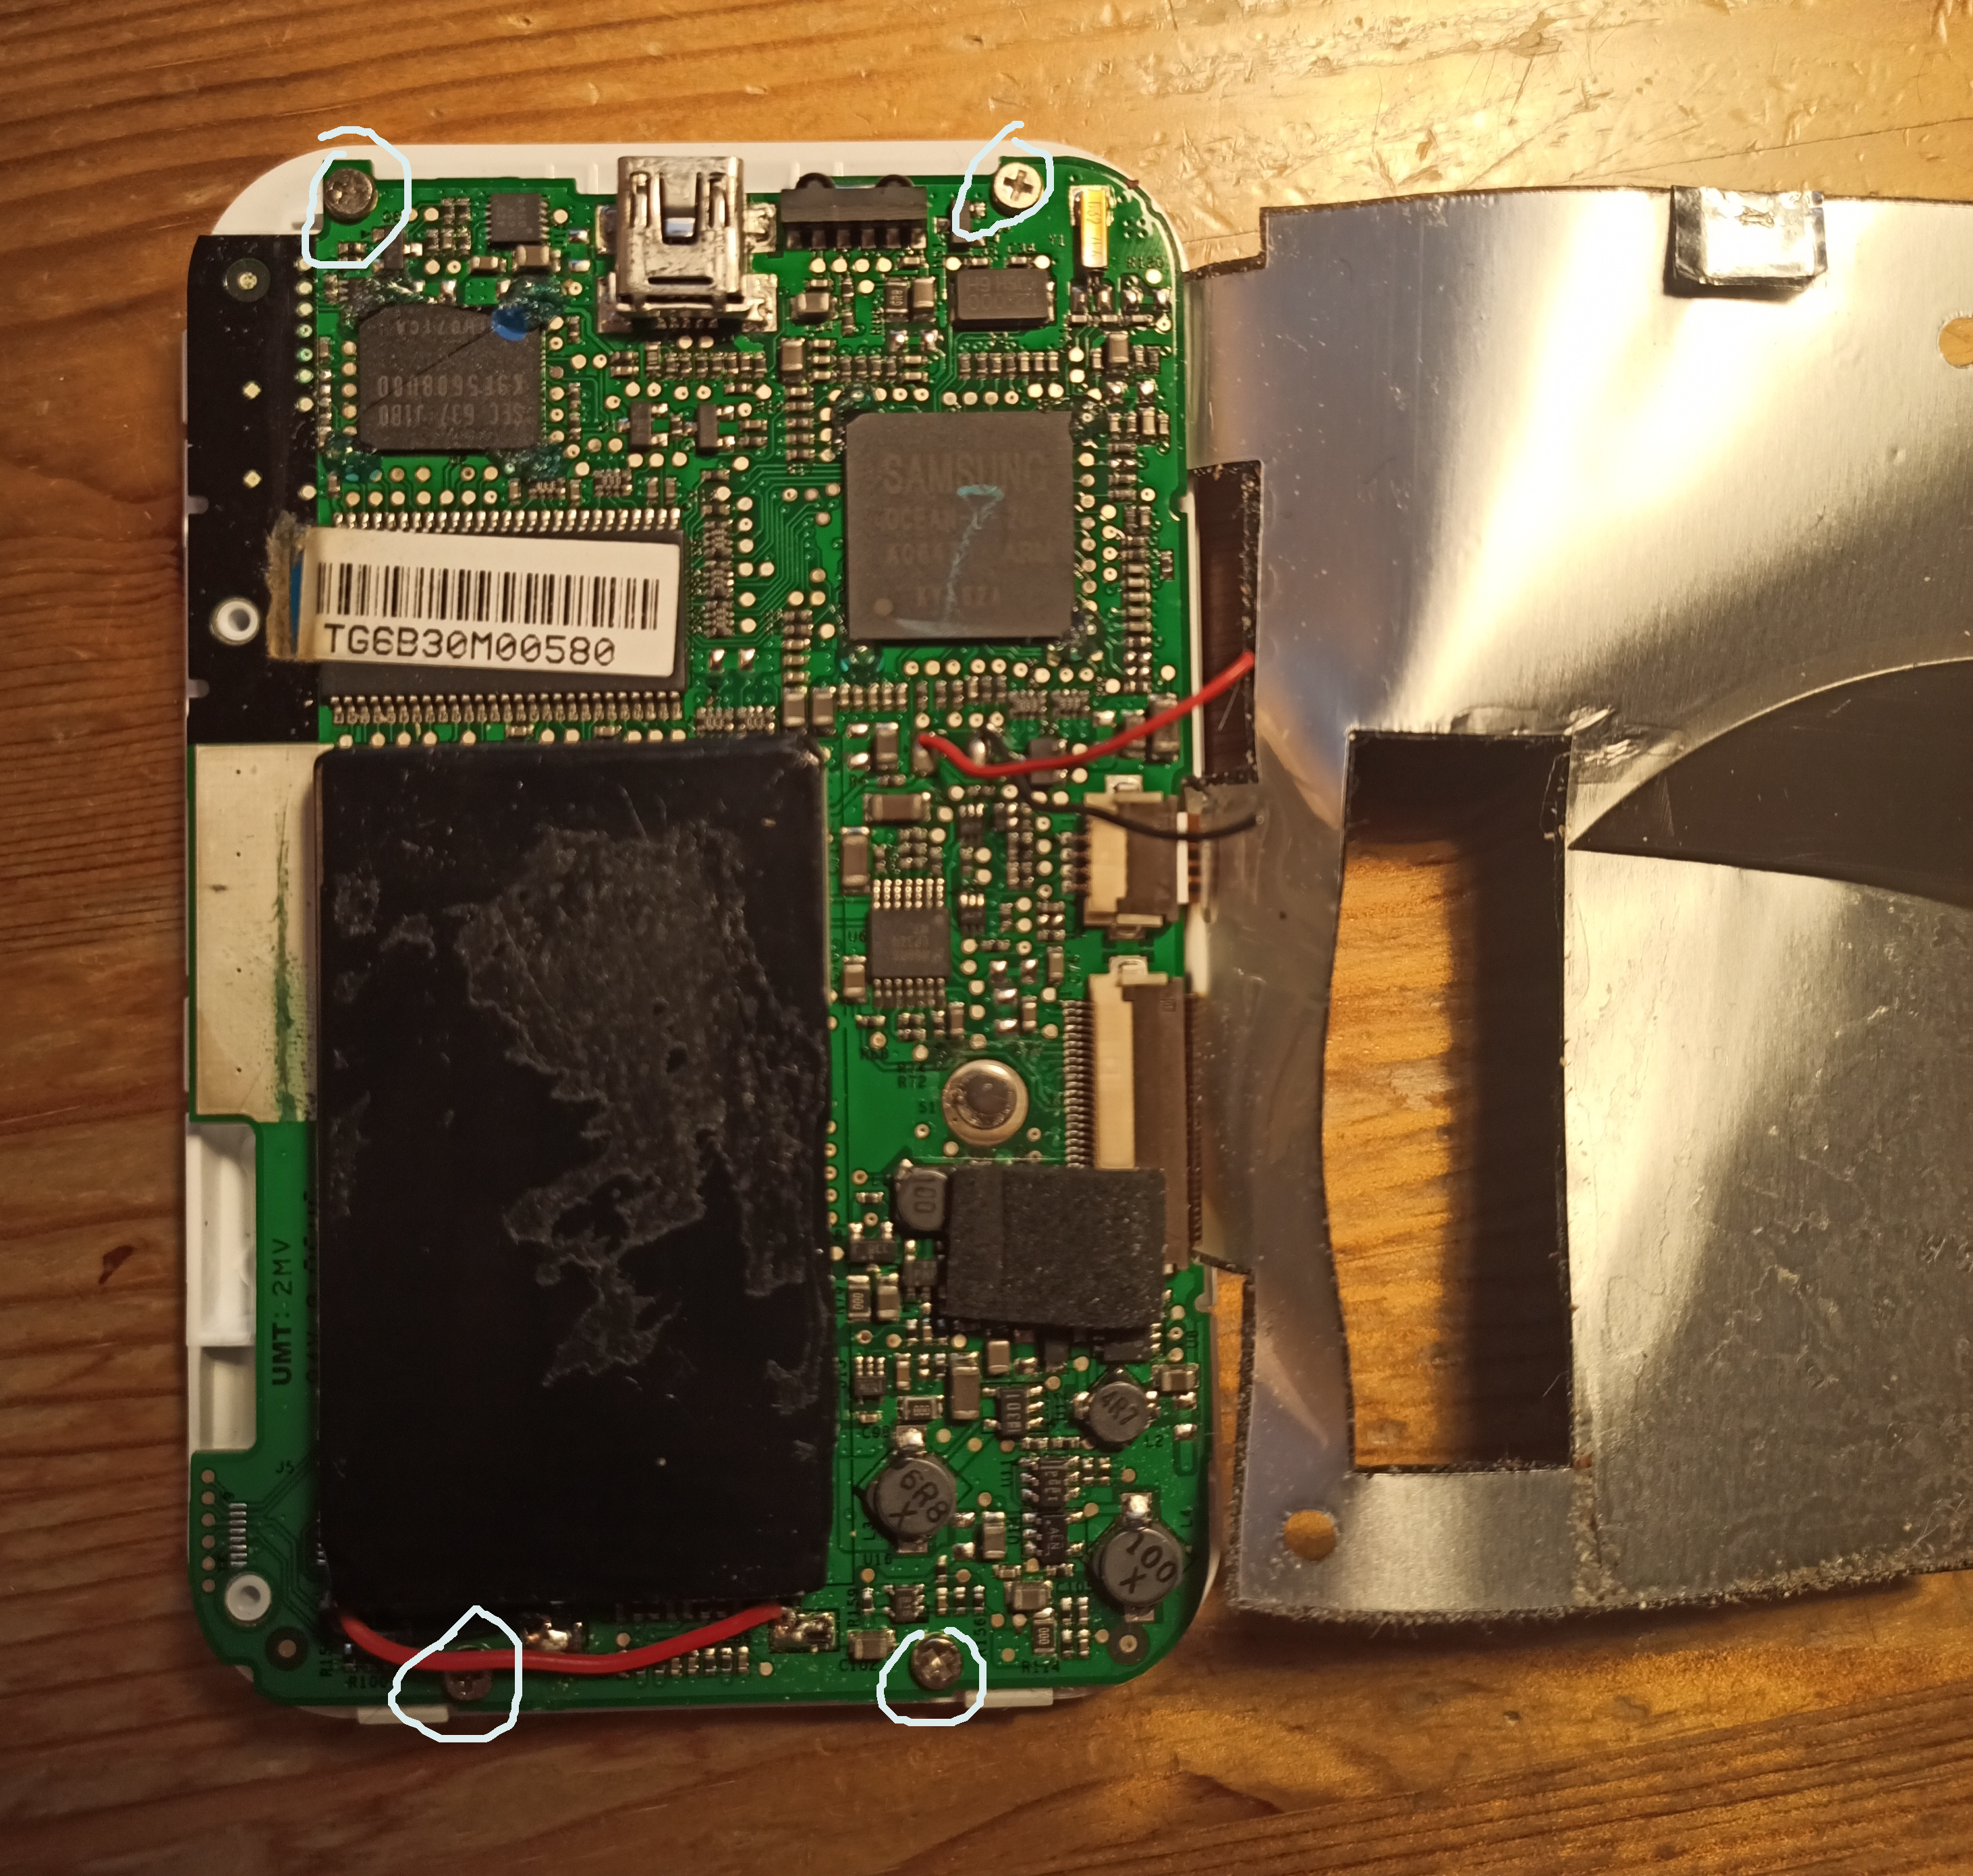
Unscrew these (torx T3).
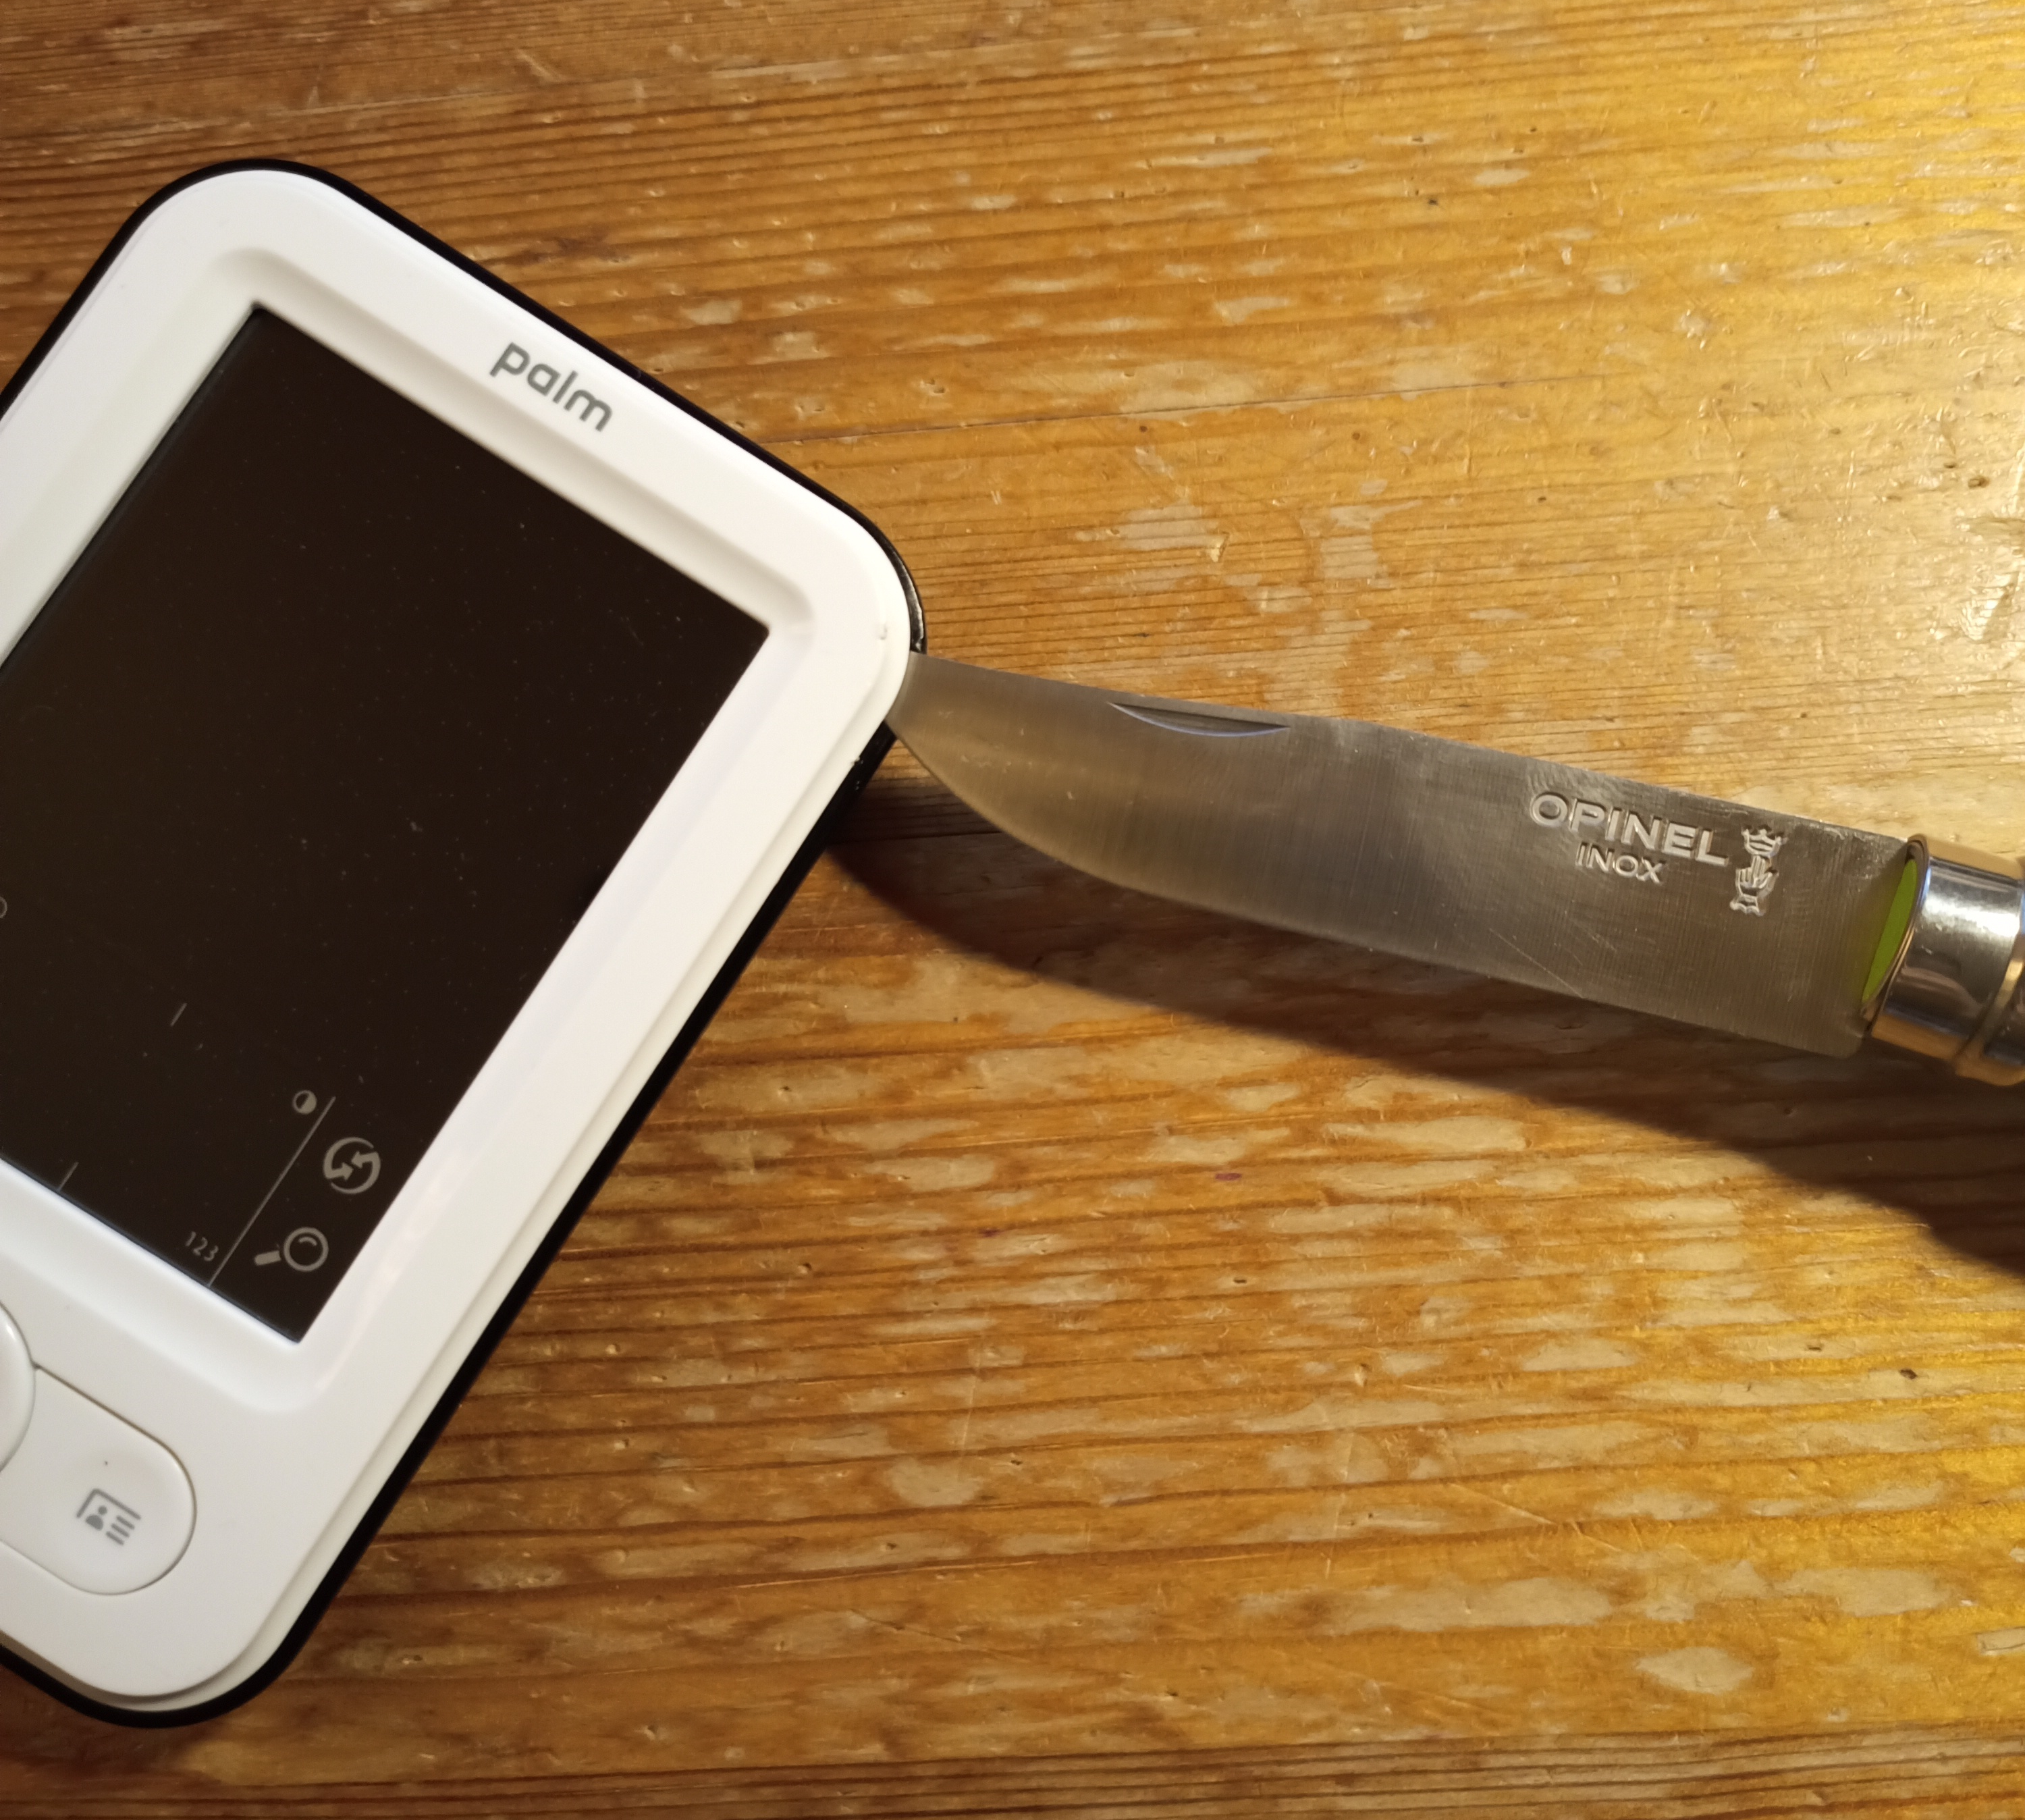
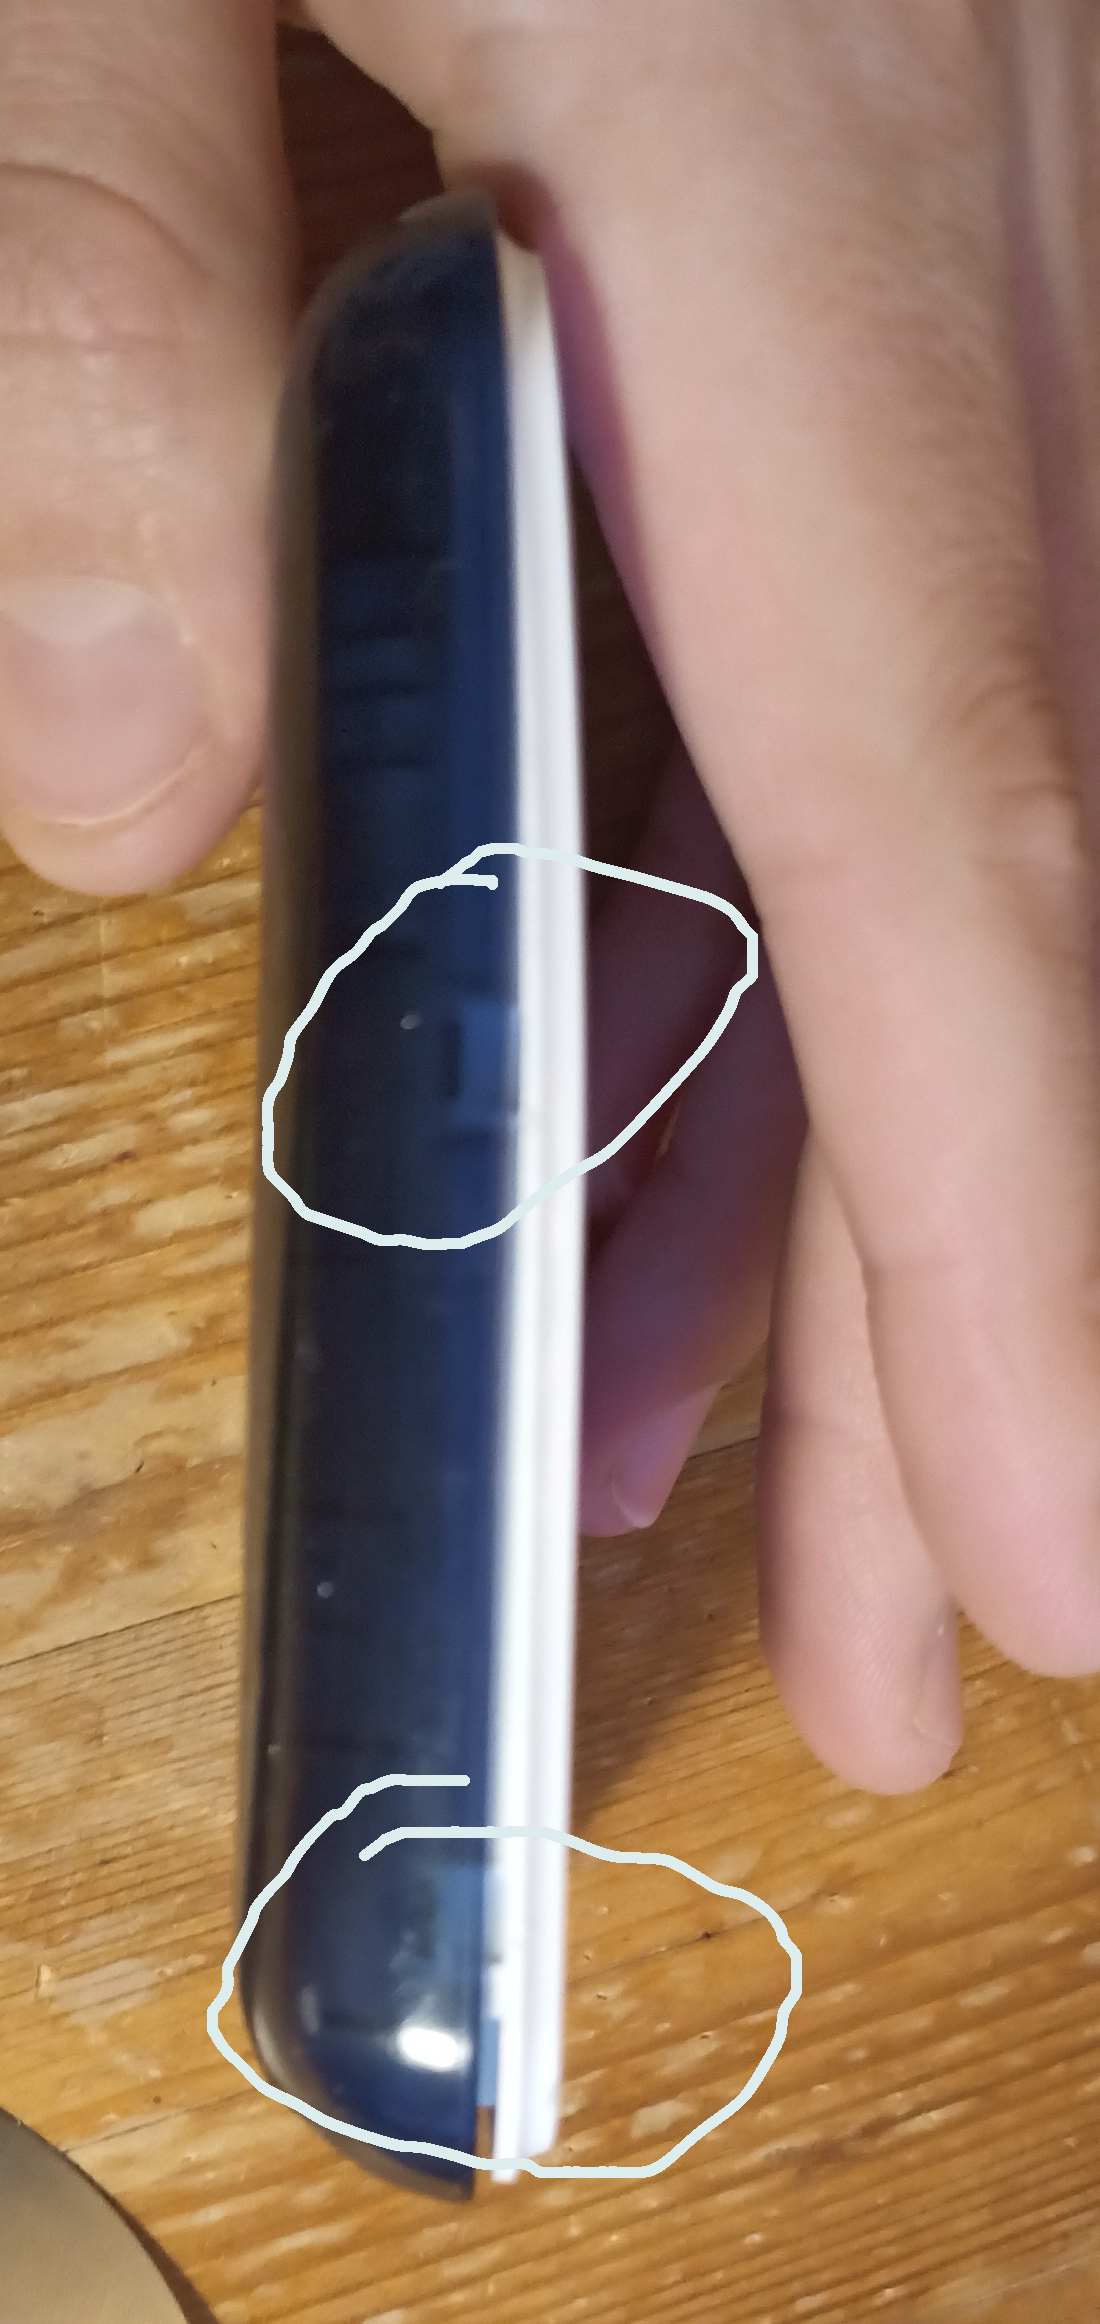
Use knife as lever to pry open the chassis. (retainer circled). Don't be too brutal, the retainer are a bit flimsy.
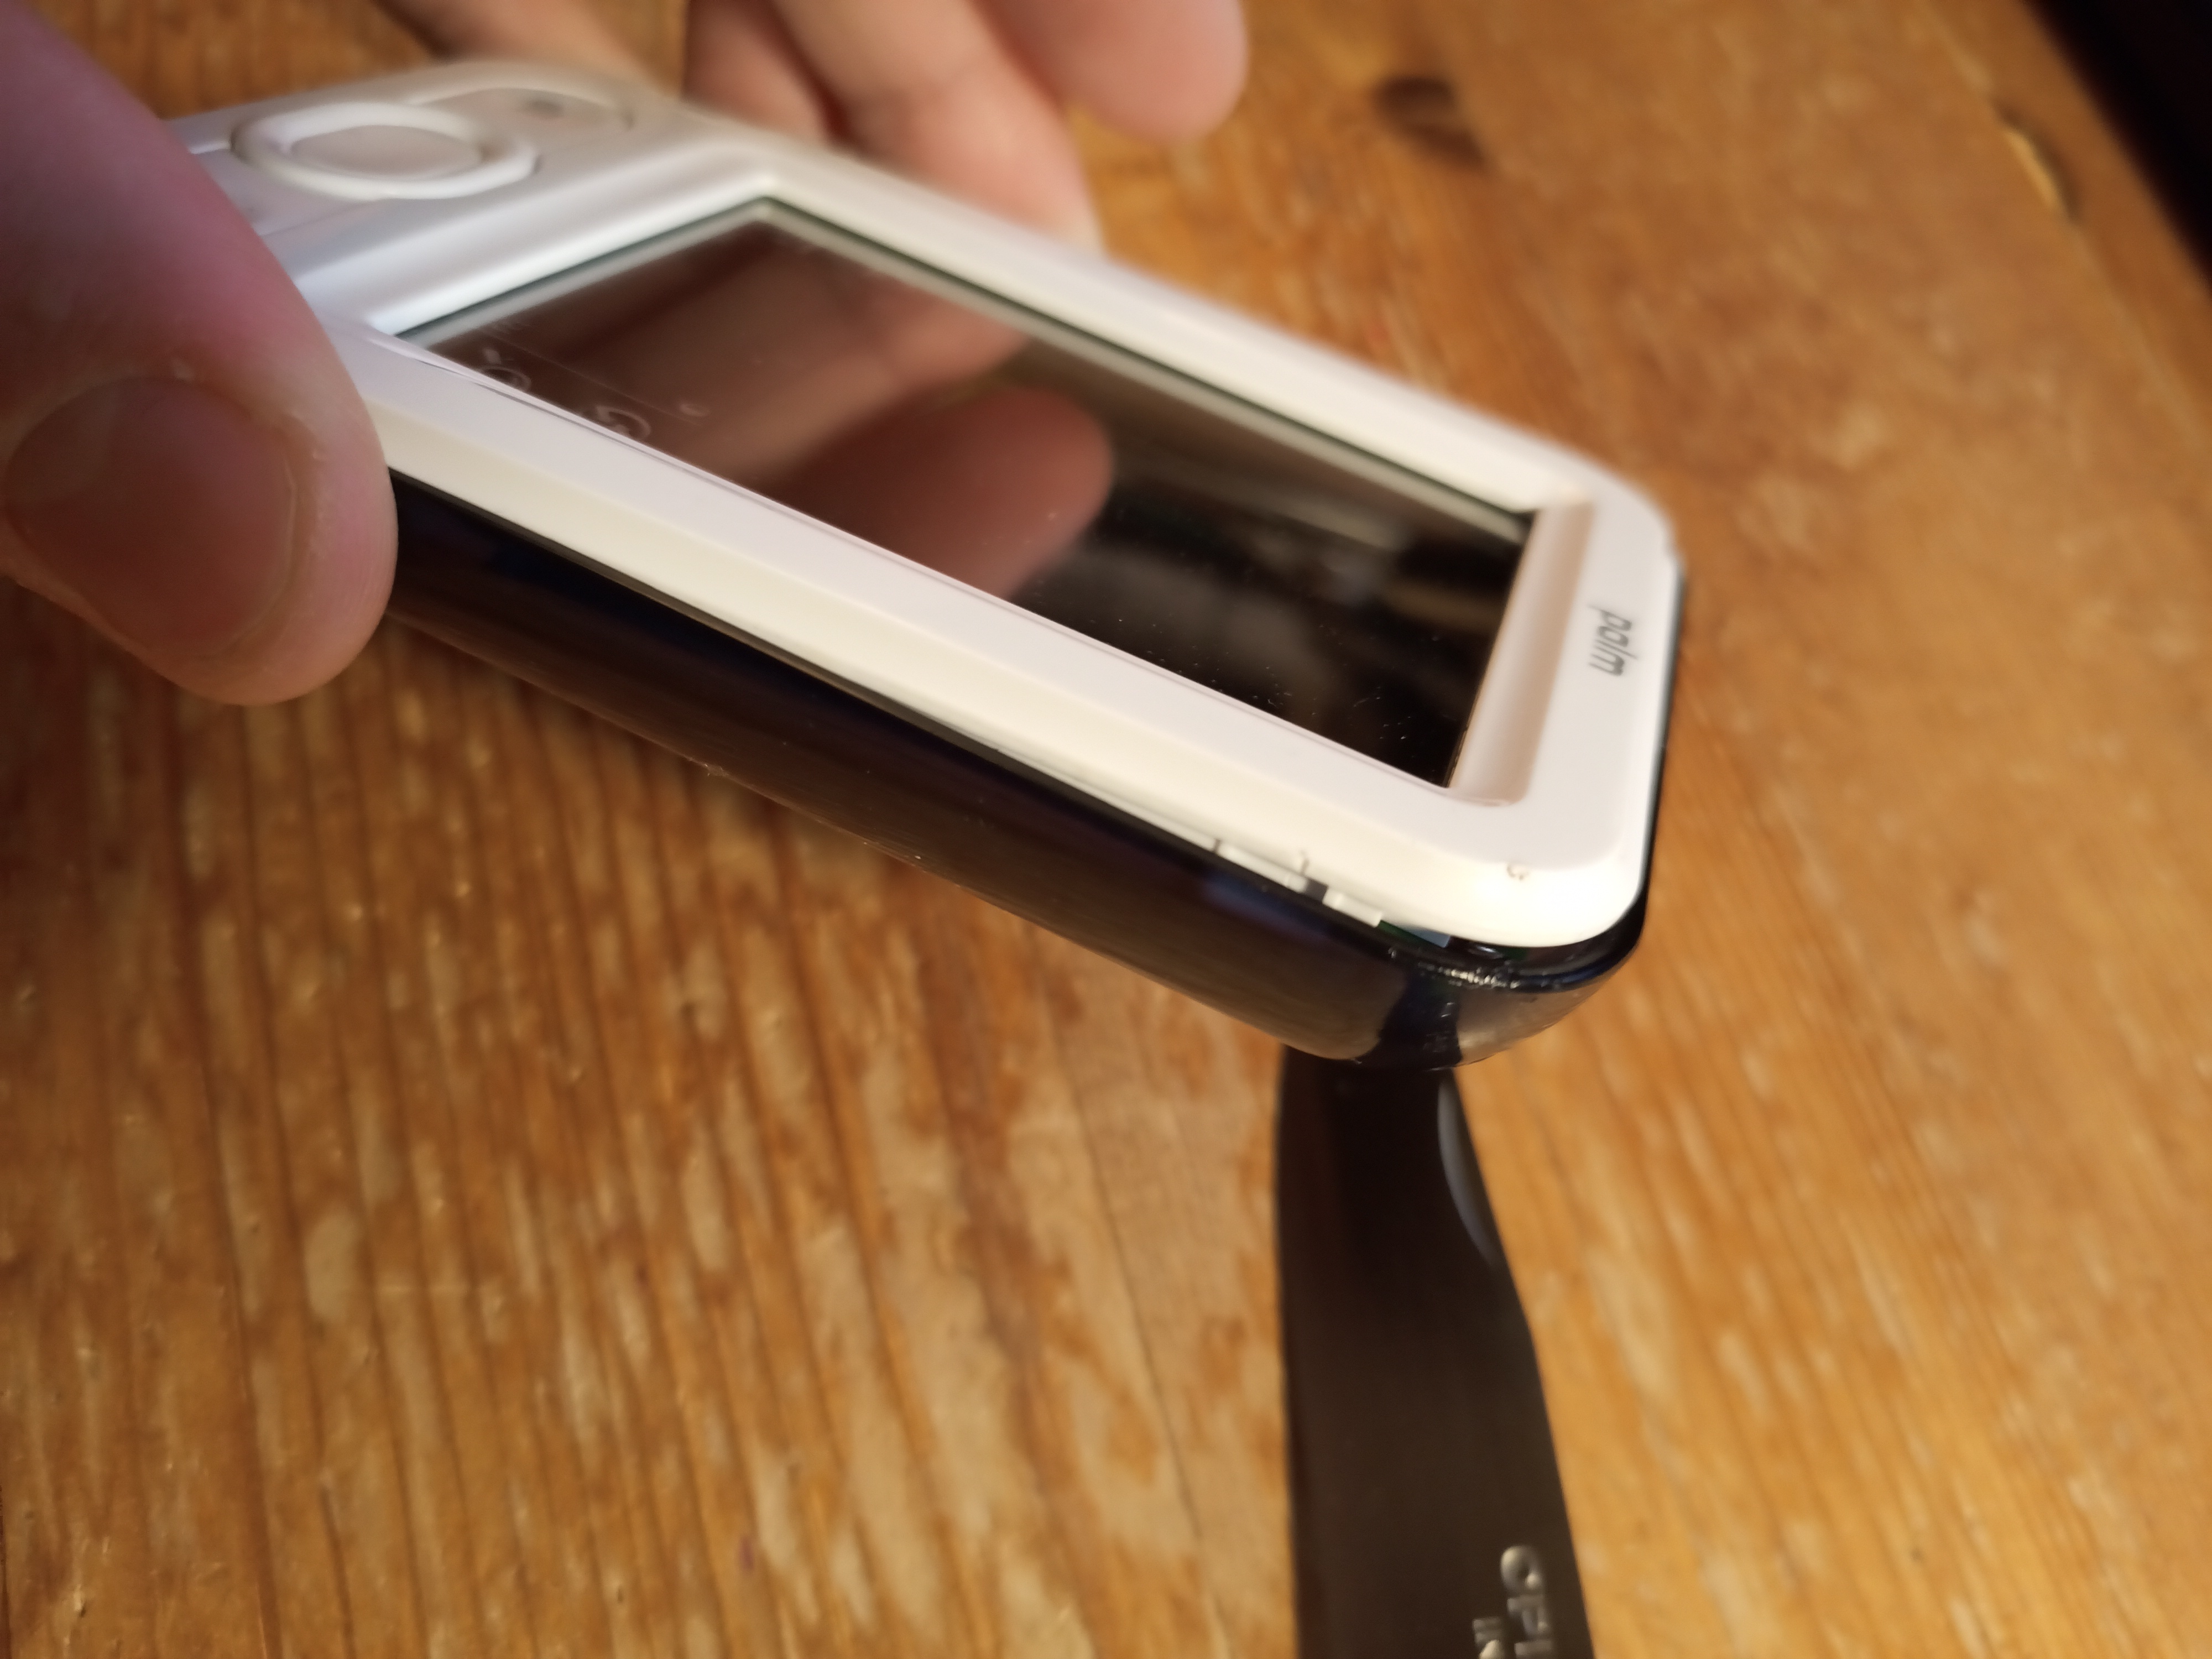
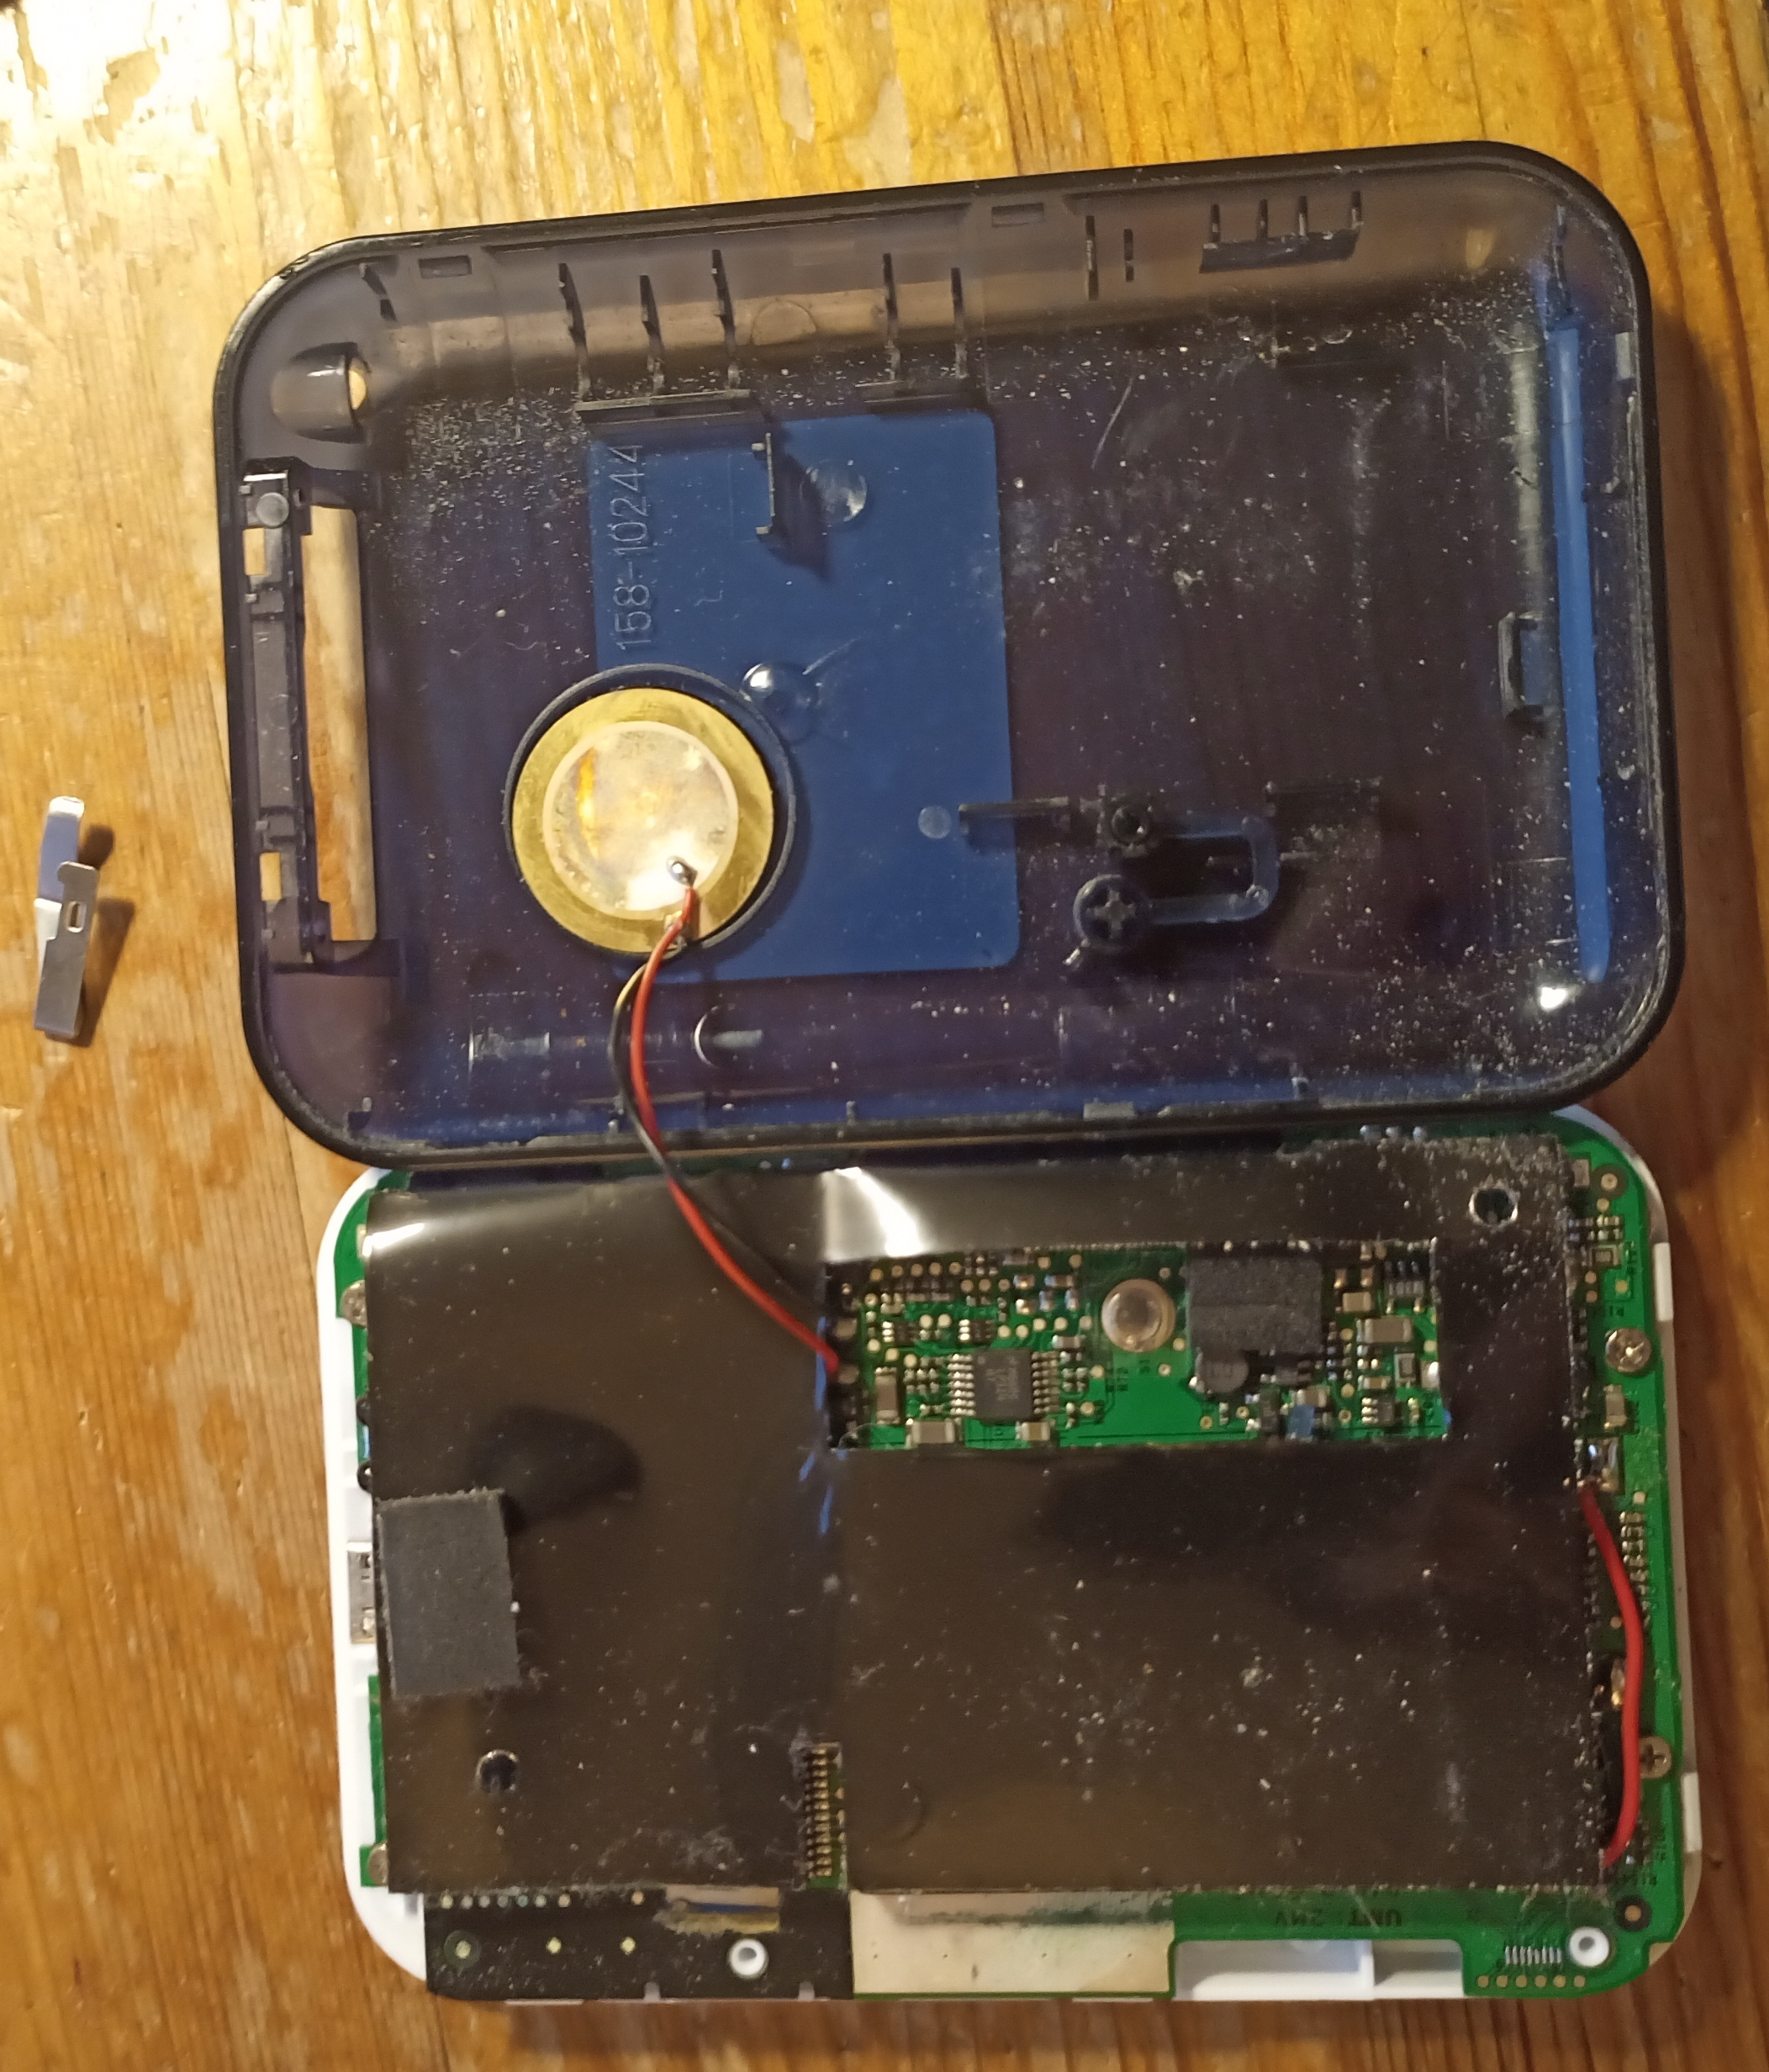
Clean disguting dust due to open design (eww), then softly remove black adhesive (do not cut, just lift). Keep the spring thingy for the reset button.
Unscrew these 4 screws, then lift off the front chassis. I'm a barbarian that won't use the PC-speaker thingy, so I just cut the wire for convenience. Up to you. Not too difficult to put back together, and will make working on it easier.
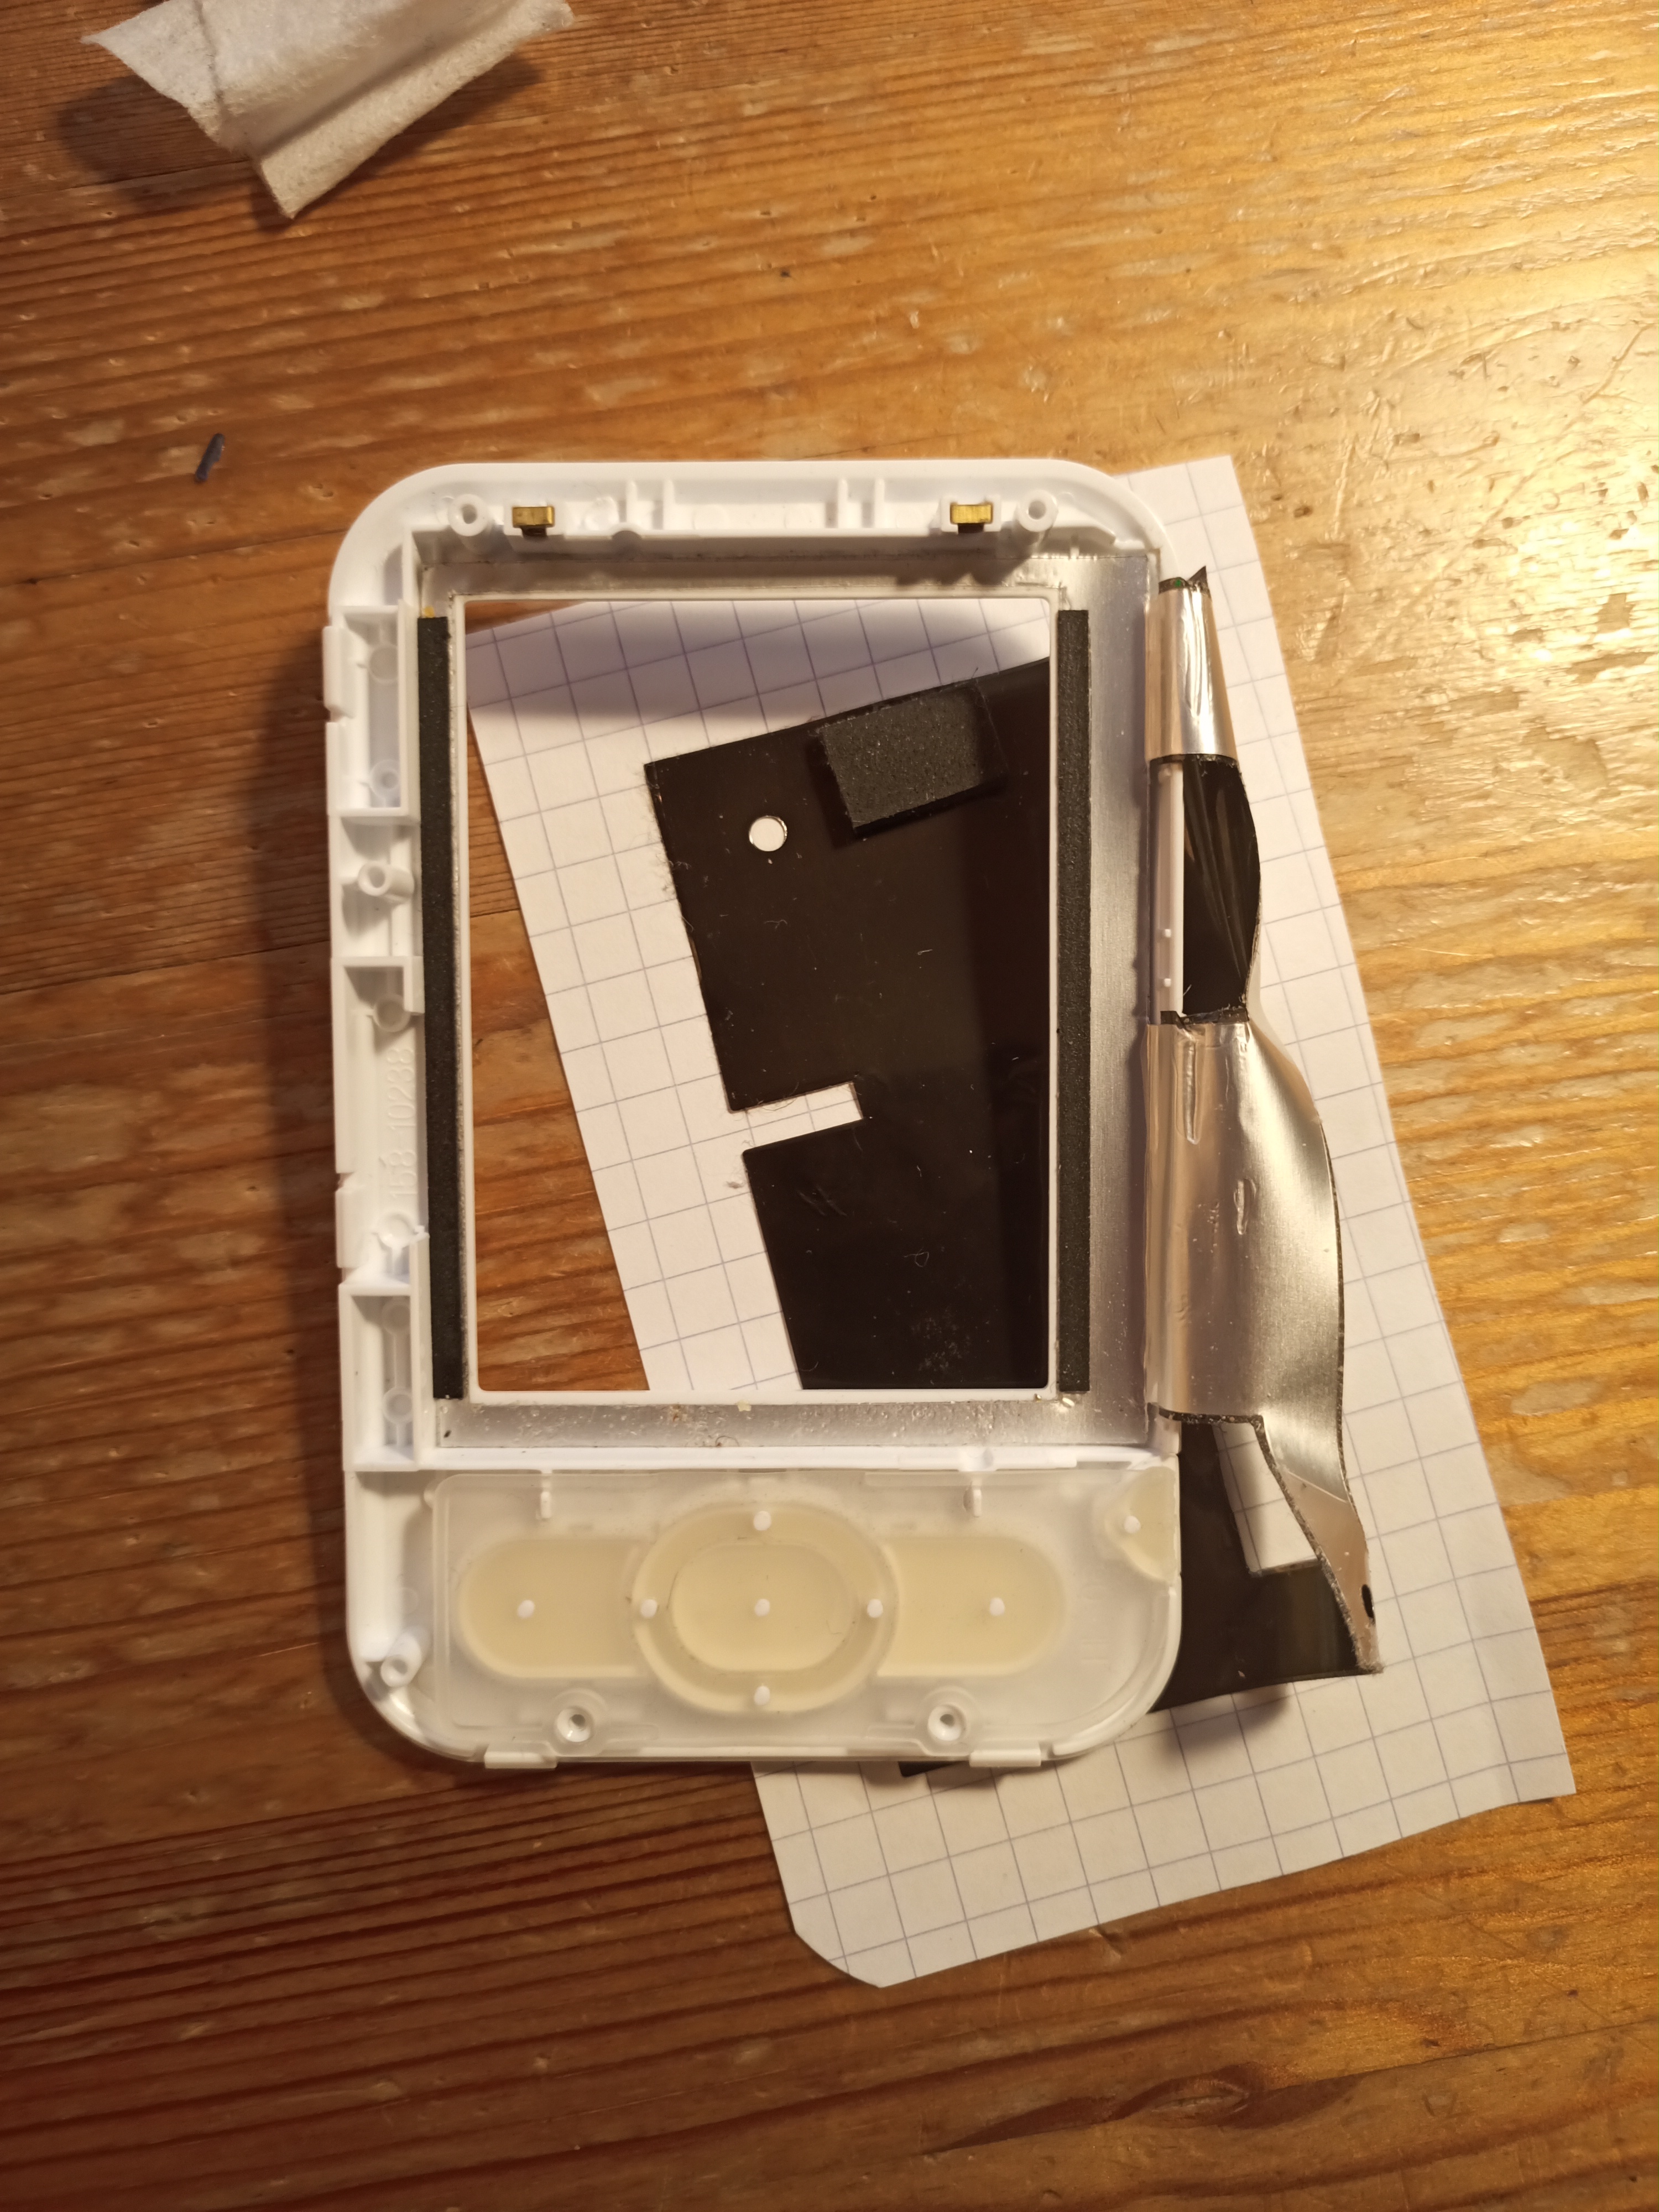
Board is liberated!
Misc
Getting a z22
I got my 2 used z22 for about 15€ each, shipping included, from ebay. Wouldn't pay more than 30€ for a used one. Maybe 40€ for a new in box. (nov. 2020)
